Shitaji Togi: A Guide to Foundation Polishing in Japanese Swords
NO AI USED This Article has been written and edited by our team with no help of the AI
Shitaji togi or foundation polishing is the first of two parts in Japanese sword polishing to bring out the features in the blade’s steel surface.
With the other half of the process known as shiage togi, these complex stages are performed by a toshigi, a professional Japanese sword polisher.
This article takes an in-depth look at foundation polishing, the tools required, and what to expect during the process.
A Brief Overview of Shitaji Togi
In the first half in Japanese sword polishing, there are several principles the togishi has to keep in mind during the process:
- Great control and precision – This is to prevent the blade being damaged by the larger and coarser polishing stones.
- Awareness of blade and stone contact – Due to the curved blade, care is required to ensure the amount of blade that comes in contact with the stone.
- Blade’s ridgeline – Special attention is needed around the ridgeline as any mistake can ruin the sword’s appearance.
Tools of the Trade
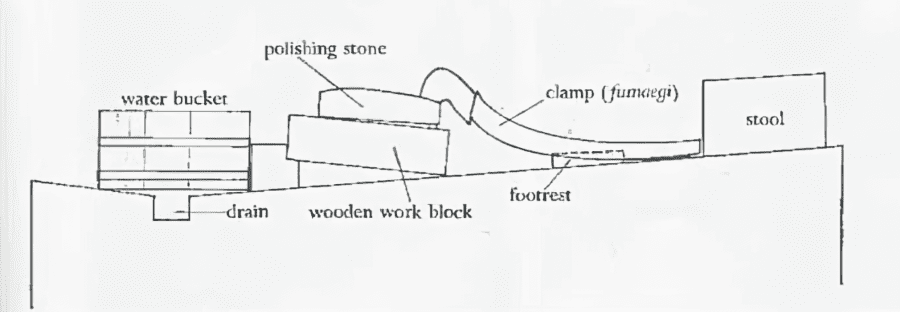
Like any craft, there are specific tools of the trade. Besides an area with a sloping floor and drain to allow the water to flow away from the work surface, the togishi will also require various items.
- Bucket of water – Water is a lubricant and must be constantly applied during polishing.
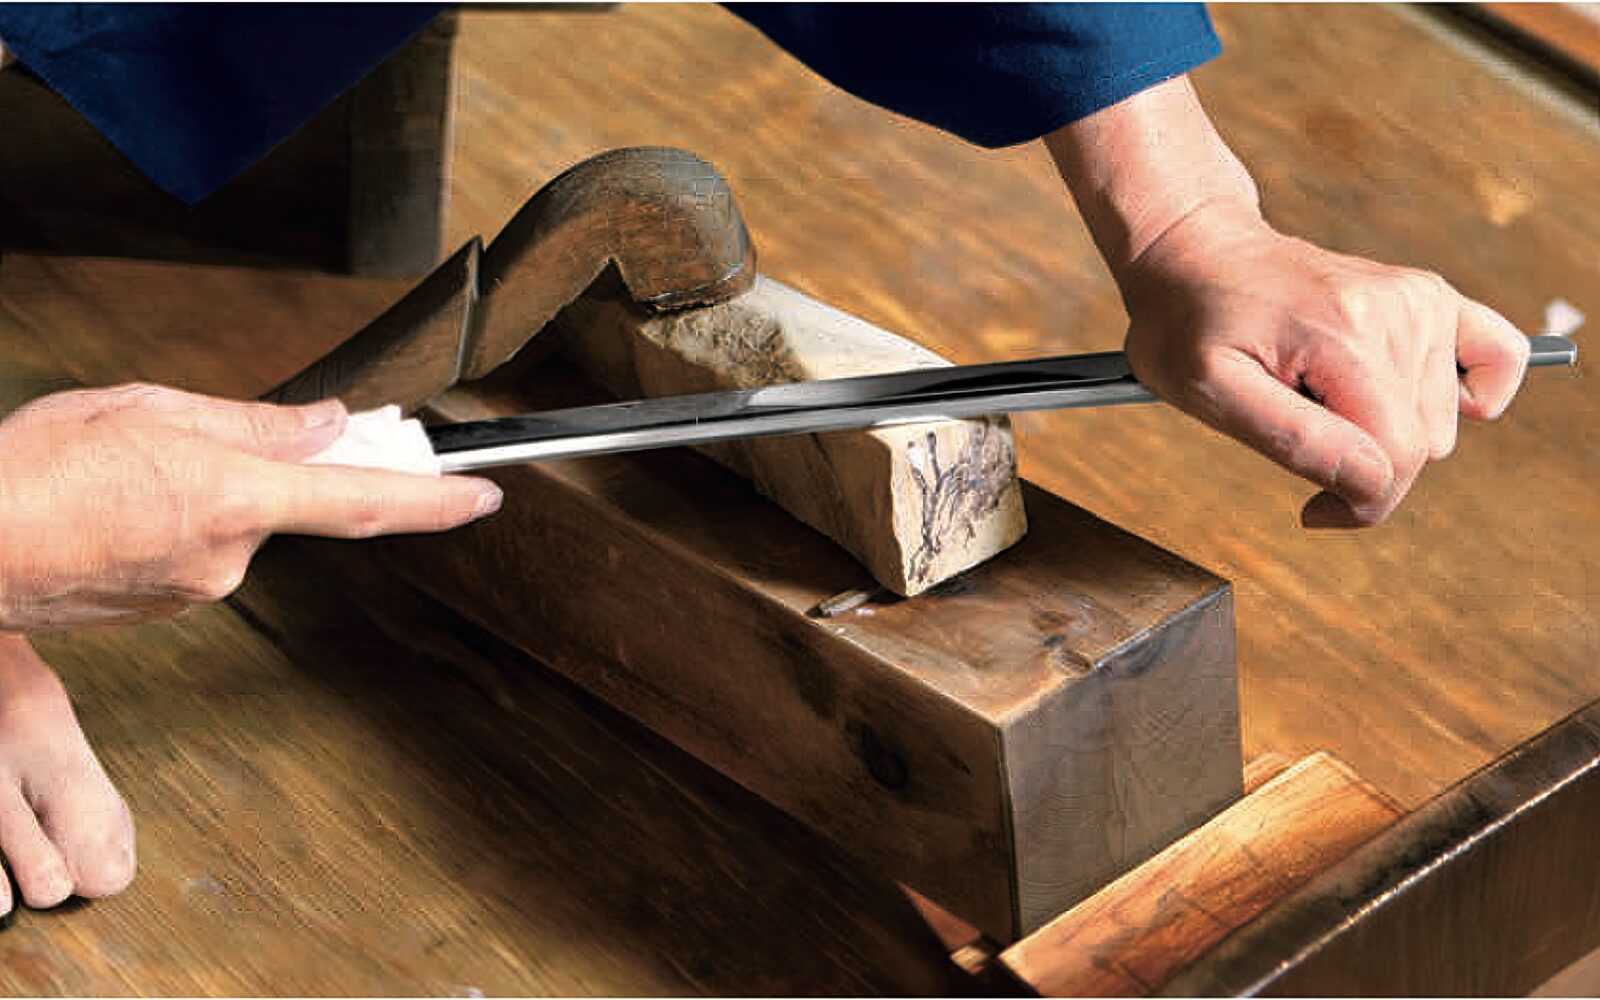
- Fumaegi – A curved piece of wood with a hook end to clamp the polishing stone to the wood block to prevent it from moving. It also does not put too much pressure on the stones and allows them to be switched out easily.
- Polishing Stones – Polishing starts with rough stones to reshape the sword or remove marks, followed by finer stones for a progressively smoother finish. While natural stones were traditionally used, synthetic stones are now effective for the initial stages.
- Wooden work block – To hold and elevate the polishing stone.
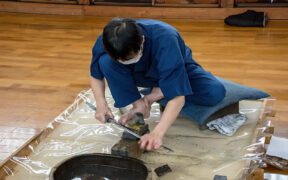
The Working Position

The togishi has to be in the correct working position. Holding the back straight, the polisher sits on a low stool with the right heel pressing down on a fumaegi. The right knee is wedged into the right shoulder while the left foot is curled beneath the body. For safety reasons, the sharpened edge always faces away from the body.
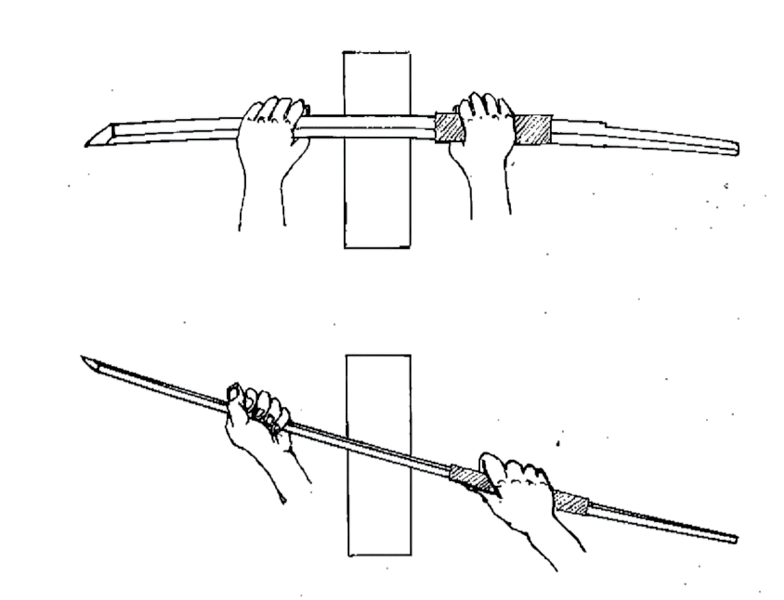
The right hand holds the sword with a rag. Meanwhile, the left palm rests on the blade’s upper surface with the fingers on the lower surface. Although the fingers wrap around the blade, pressure is never directly exerted over the sharpened edge.
Only 4 to 5 inches (10.2 – 12.7 cm) of the blade is worked at a time as any wider would be difficult to control.
Working systematically, the togishi concentrates only on one surface at a time using consistent motion and pressure. This makes it easier as well as each surface is polished somewhat differently. Surfaces include:
- Mune – Back or the sword or spine.
- Shinogi-ji – The ridgeline to the back
- Ji – The edge to the ridgeline
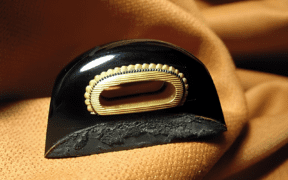
Polishing the ji is more laborious as the goal is to bring out the texture of the steel and hamon.
Stages of Shitaji Togi
The following stages are the major ones in shitaji togi. In practice, a togishi uses many intermediate stones or stones that have only a slight variation in coarseness.
Note that techniques may differ depending on the togishi or their school.
| Polishing Stone | Function | Result |
|---|---|---|
| Arato | Remove file marks, sharpen edge, smooth and straighten all lines | Create scratches on surface without revealing any features |
| Binsui | Distinguish new marks from preceding ones | Arato marks are gone |
| Kaisei | Distinguish new marks from preceding ones | Smoother and finer surface, hamon outline is visible |
| Chu nagura | Remove diagonal kaisei marks | N/A |
| Koma nagura | To refine chunagura marks | Kaisei marks are gone, hamon clearly visible |
| Uchigumori ha to | Remove marks left by the nagura stone | N/A |
| Uchigumori ji to | Bring out the jihada | Nagura marks are gone, hamon clearly visible |
Polishing stones have different levels of coarseness or fineness, measured by grit size, which indicates the size of the abrasive particles.

- Coarse Grit (e.g., 60-200): Used for heavy work like reshaping the blade or removing marks.
- Medium Grit (e.g., 300-800): Refines the surface after coarse polishing.
- Fine Grit (e.g., 1000 and above): Creates a smooth, polished finish.
Arato
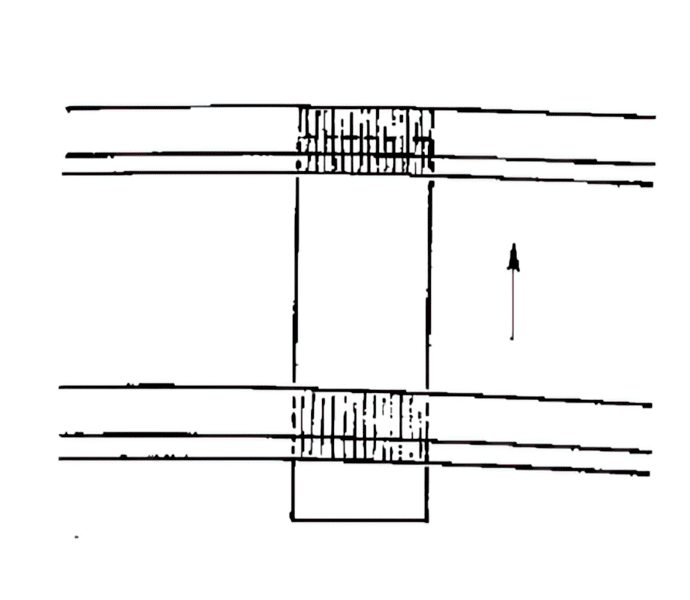
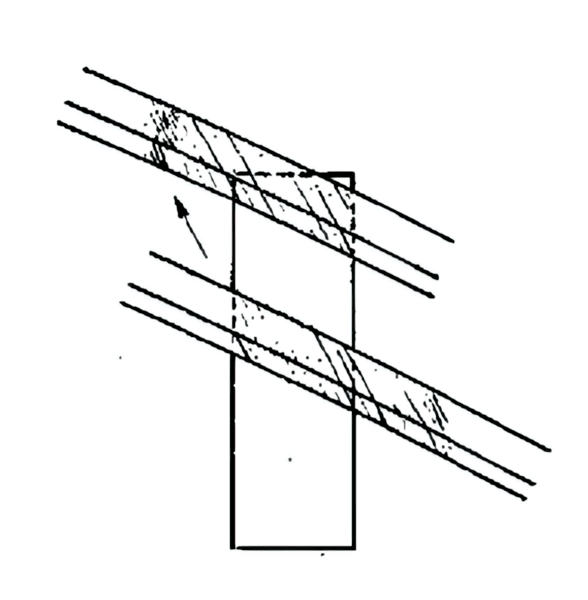
The arato stone can be used for new swords or older swords that are very rusty or badly damaged. Made of coarse sandstone or carborundum stone, the blade is moved perpendicularly across the stone with water for lubrication.
- Comparable Grit – 180
- Function
- Removes file marks
- Sharpens the edge
- Smooths and straightens all lines of the edge, back, and ridge
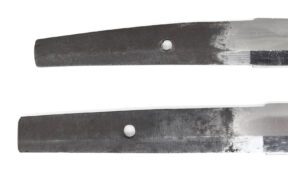
- Result: This creates scratches on the blade’s surface without revealing any features.
Binsui
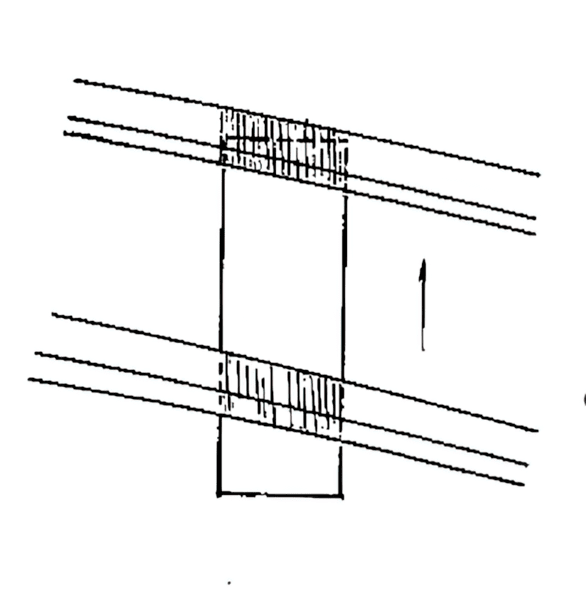
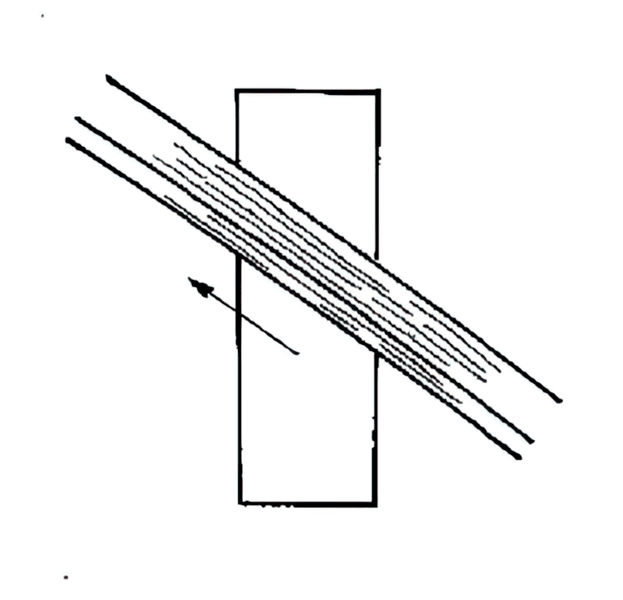
At this stage, the main concern is regarding the geometry and lines of the blade. Using the binsui stone,, a diagonal or lengthwise movement leaves shallower scratches compared to moving the blade perpendicularly.
- Comparable Grit – 280 to 320
- Function: Distinguish new marks (finer) from the coarser ones (arato).
- Result: Once the arato marks are gone and only the binsui ones are visible, the togishi moves on to the next stone.
Kaisei
The kaisei stone is used to give the steel a darker and more reflective appearance. The blade is moved at a 25 degrees angle against the stone and 20 degrees angle to its length to distinguish the new marks from those of the binsui.
By the end of this stage, the blade’s surfaces and lines will have a geometry that is not changed by the succeeding stones.
- Comparable Grit – 400 to 600
- Function: Distinguish new marks (finer) from the ones left from the binsui stone.
- Result: Besides the surface becoming smoother and finer, the outline of the hamon also becomes visible.
Nagura
There are two types of nagura stones: the coarser chu nagura and the finer koma nagura, available in natural or synthetic forms.
The blade is polished by moving it along the stone lengthwise with a slight rocking motion, which applies more pressure and ensures shallower marks compared to diagonal polishing.
- Comparable Grit
- chu nagura – 800
- koma nagura – 1,200 to 1,500
- Function
- chu nagura – To remove diagonal kaisei marks
- koma nagura – To refine chu nagura marks
- Result: Kaisei marks are gone and hamon is usually clearly visible.
Uchigumori
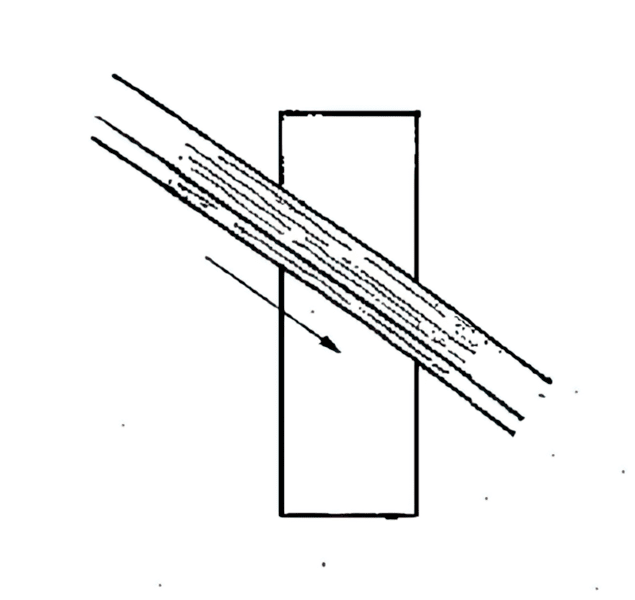
At this stage, only natural stones are used. The togishi must inspect the stones for defects that can scratch the blade. While the blade was pushed across the stone previously, in this stage, it is pulled.
There are two types: uchigumori ha to and uchigumori ji to. Much finer than nagura stones, their specific grit depends on the sword being polished based on their shape, tightness of their welds, and carbon content.
For this reason, a togishi tends to have several grades of uchigumori. Choosing which one to use all depends on their experience and vision of the blade’s final appearance. The blade is moved lengthwise without the rocking motion to prevent scratches.
- Comparable Grit
- uchigumori ha to – 3,000 or more
- uchigumori ji to – 3,000 or more
- Function
- uchigumori ha to – Used on all surfaces to remove marks left by the nagura stone.
- uchigumori ji to – Only used on the edge and sides to bring out the jihada above the hamon.
- Result: The marks from the nagura stone are gone, hamon is now clearly visible, and the blade is ready for shiage togi.