33 Essential Katana Parts Everyone Should Know
NO AI USED This Article has been written and edited by our team with no help of the AI
The Japanese Katana is one of the most well-known swords in the world. Swordsmiths in Japan made swords of high-carbon steel during the Kamakura period. The Katana has a single-edged blade that is curved at one end. The sword is popular among collectors and people who do martial arts, but few are familiar with the parts of the sword.
In this article, we will talk about the different kinds of Katana and all the parts it contains, how they were made, and their features.
Main Katana Parts
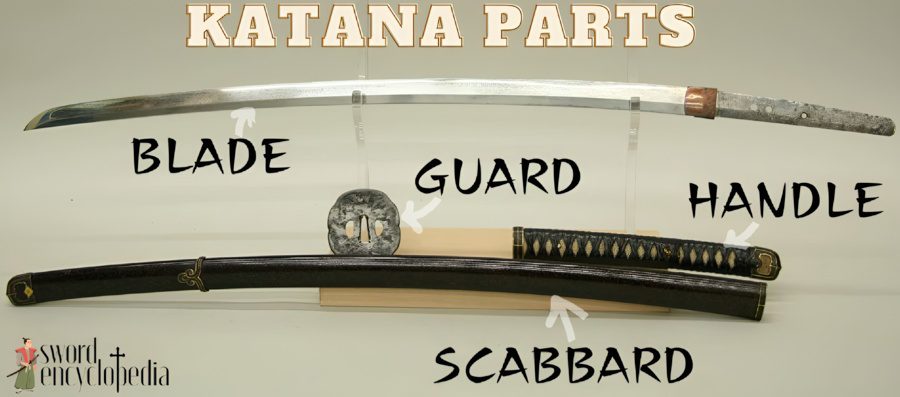
The Katana’s main parts are created separately through different procedures that could take months. The main parts of a katana includes the following:
- Blade
- Guard
- Handle
- Scabbard
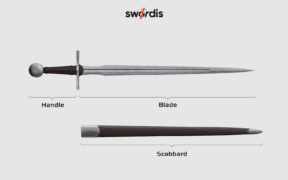
Blade – Nagasa

The blade is the most important part of the sword. The Katana blade is designed to cut, slash, slice, and pierce. The parts of the Katana blade can be divided into the following:
- Nagasa – Referring to the entire blade length
- Kissaki – The blade tip
- Hi or Blood Groove – The fuller or groove
- Hamon – A distinct blade pattern throughout the blade’s length
- Ha – The sharpened edge of the Katana blade
- Mune – The unsharpened edge or spine of the Katana blade
- Sori – The curvature of the Katana
- Shinogi – The blade’s ridge that extends through the blade’s central line
- Shinogi-Ji – The upper part of the blade’s ridge
- Yokote – A blade ridge or line at the ending of the blade
- Jihada – The Katana’s blade grain
- Nakago – Tang of the Katana blade
- Mei – Writing or signature of the bladesmith
- Mune–Machi & Ha-Machi – The upper and lower part where the Nakago ends and the Nagasa starts
Nagasa
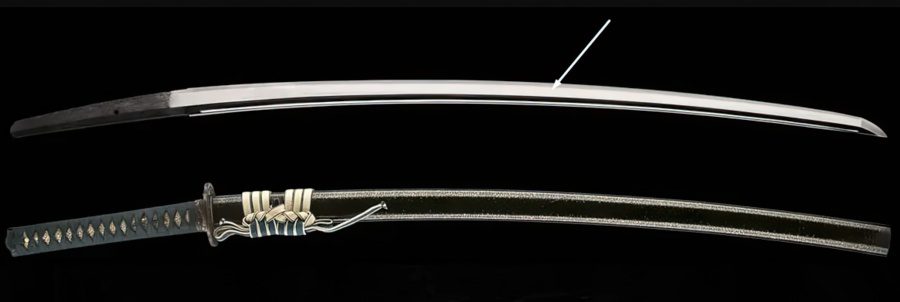
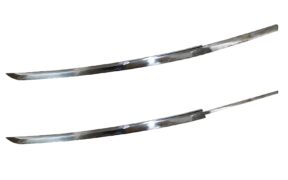
The Nagasa refers to the span and length of the Katana’s blade beginning just under the tsuba handguard and ending at the kissaki tip. The blade of the Katana is traditionally made out of folded Tamahagane steel, but today there are many other superior types of mono carbon steels that can be used for it. Katana blade lengths are usually around the 31-inch (80 cm) mark, single-edged, and curved. They can be used for powerful slashing strikes as well as effective thrusts thanks to their sharp tips.
Kissaki
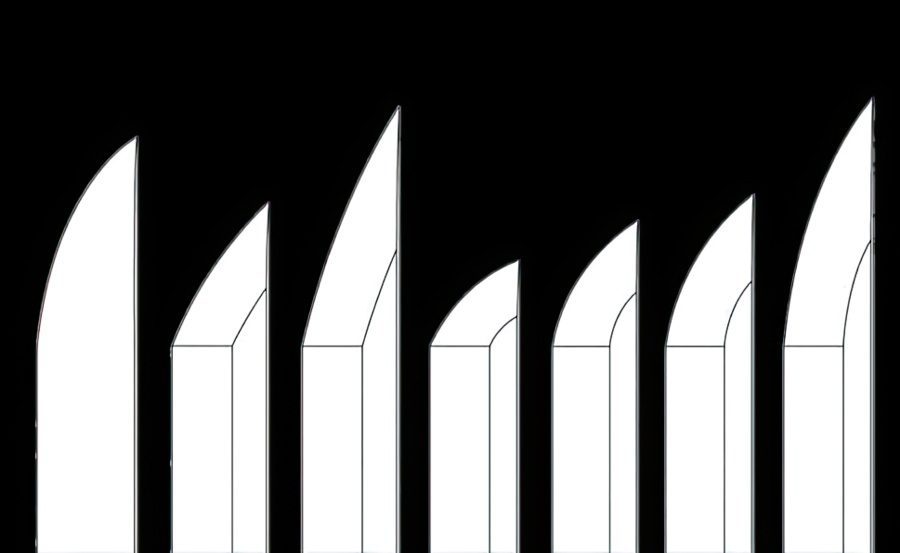
The Kissaki is the tip of the Katana’s blade. The shape of the tip is different from medieval swords. While most European swords have their tips pointed to the center, the Kissakis’ point is at the edge of the blade.
The Kissaski gives the sword the ability to thrust. This way, the Samurai could use the katana to both cut and stab. There are many different variations and some of the most popular ones are Chu-Kissaki, O-Kissaki, Ko-Kissaki, and the Ikari-O-Kissaki that has a more prominent curvature.
Boshi
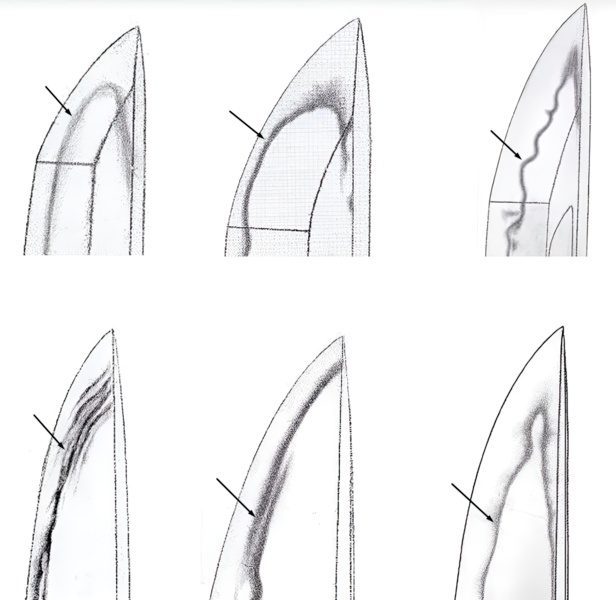
The boshi is the hamon pattern at the end of the blade’s tip (kissaki). This is not an easy feature to achieve on a Katana and it usually demonstrates the experience that the bladesmith has. An ideally shaped boshi should follow the hamon line and turn on itself to touch the yokote which separates the kissaki from the rest of the blade.
Hi or Blood Groove
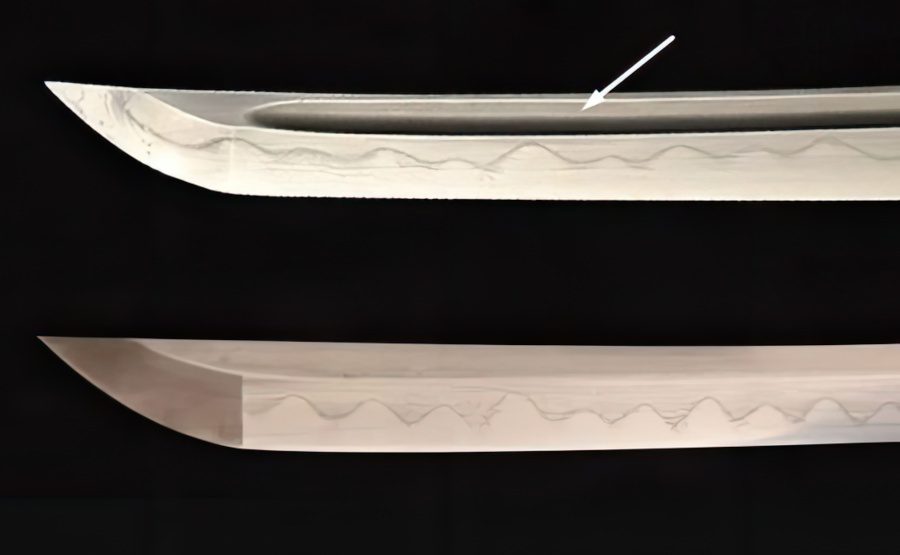
The groove or fuller that can come in different shapes, sizes and even numbers on a Katana blade is called a Hi. Although inaccurate, it is sometimes referred to as a “blood groove” because of the myth that it helps with extracting the enemy’s blood faster, making the blade more lethal.
Instead, the groove functions to lightens the blade and gives the sword a unique aesthetic appeal. The Hi can come in very different shapes and some of the most popular ones are Bo-Hi, Soe-Hi, Naginata-Hi, Tome-Hi, Kakinagashi-Hi, Koshu-Hi, and Shobu-Hi.
Hamon
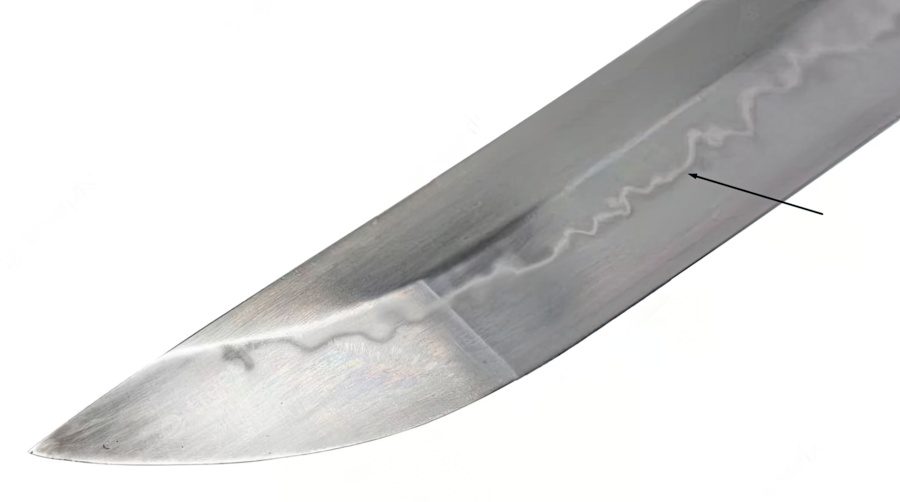
The Hamon refers to the wave-like pattern on the blade’s surface that results due to the tempering process. After forging and crafting the sword at high temperatures, the clay covering makes the sword harden unevenly, leaving this pattern.
Traditionally made Katanas that are made by folding the Tamahagane Steel are differentially hardened by using a clay tempering method. The clay is only added on the blade’s edge to make it harder. This process leaves the Hamon as a visual aesthetic. Besides resulting in the harder and sharper edge of the blade, many Hamon patterns also give the blade a unique look.
Ha
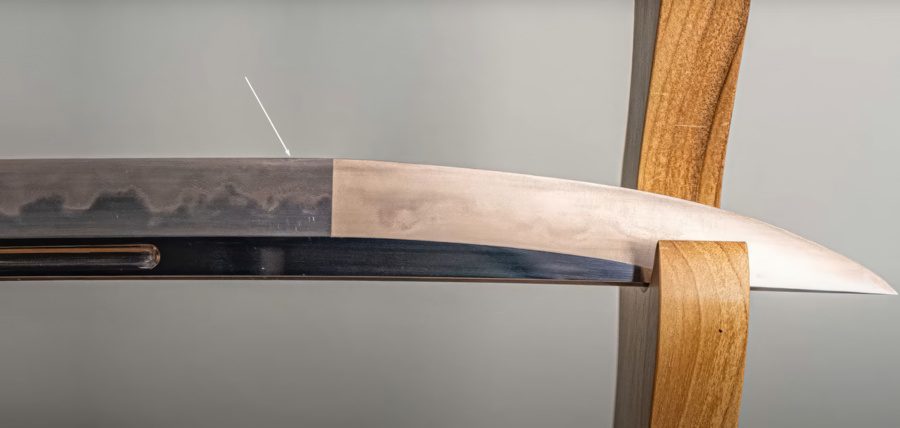
The Ha is the razor-sharp edge of the Katana. The most dangerous part of the Katana, it is differentially hardened to ensure that it is harder and more rigid than the rest of the blade. It is important to find the balance between hardness and sharpness as a sword that is too sharp may be too thin, causing it to break.
Mune
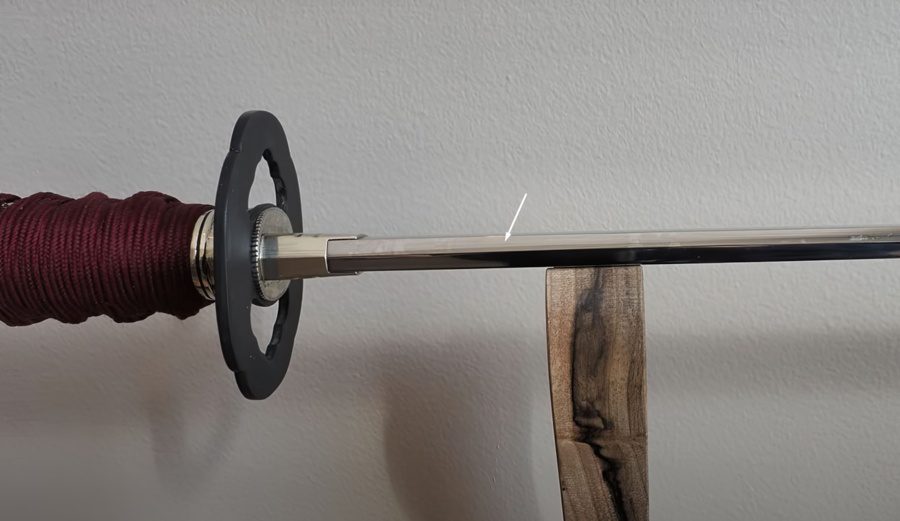
The back of the blade is called Mune. Flatter and wider than the cutting edge, it is mostly made of soft and medium steels to make the Katana flexible and less brittle. Japanese swordsmiths used multiple crafting procedures to strengthen the Mune to withstand impacts from other steel swords.
Sori
The term “sori” refers to the curvature of the blade. It is what makes the Katana different from other straight blades. There are many shapes of Sori that can be seen on a Katana, but the most traditional and popular ones are called Toori Sori, Saki Sori, and Koshi Sori. A Katana without a Sori, or a curve, is not a real Katana blade.
Shinogi
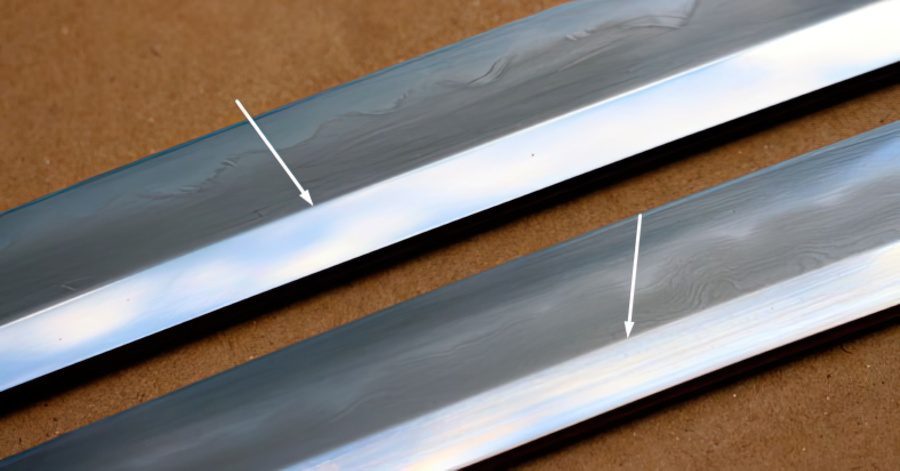
The Shinogi is the ridge line where the sword goes from the angled part that forms the edge to the Shinogi-Ji. The Shinogi Ji is the flat part of the Katana blade. They go together in a pair.
The higher the ridgeline, the better a sword will be able to cut harder targets (and the worse it will do on softer targets), and vice versa. A sword with a medium height ridgeline is the most versatile and can cut both light and heavy targets. The blades that do not have a Shinogi or a Shinogi Ji are called Hira-Zukuri.
Shinogi-Ji
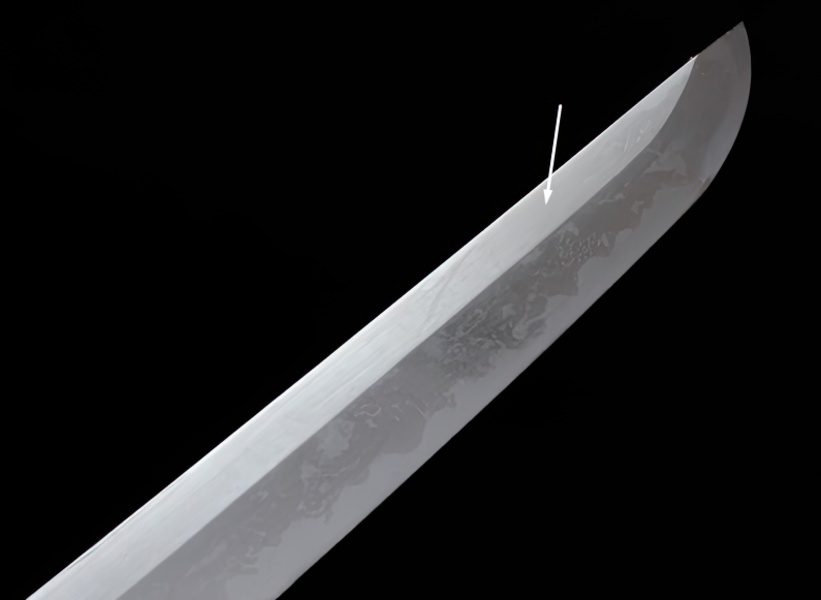
The area between the blade’s spine and the previously mentioned Shinogi ridge is called Shinogi-Ji. This is usually a much brighter part of the blade and in most cases does not feature the Hamon pattern on it. The Shinogi-Ji ends just before it reaches the blade’s tip or to a region called Mitsu-Kado, where the Yokote line and the Shinogi lines intersect.
Yokote
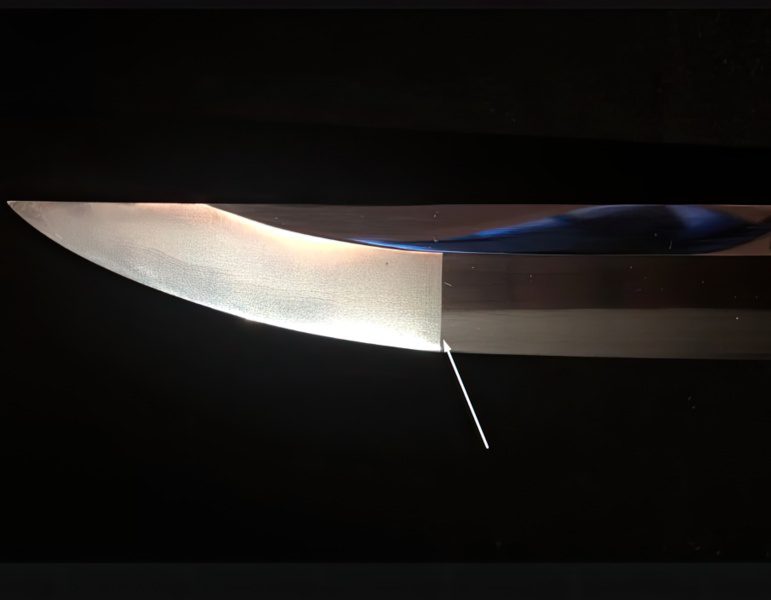
The Yokote is the line from which the Kissaki starts. Most Katanas have this feature and they are made for aesthetic reasons as well as giving the Kissaki different sharpening and tapering profiles. The Yokote is the separation mark between the blade’s length and tip.
Jihada
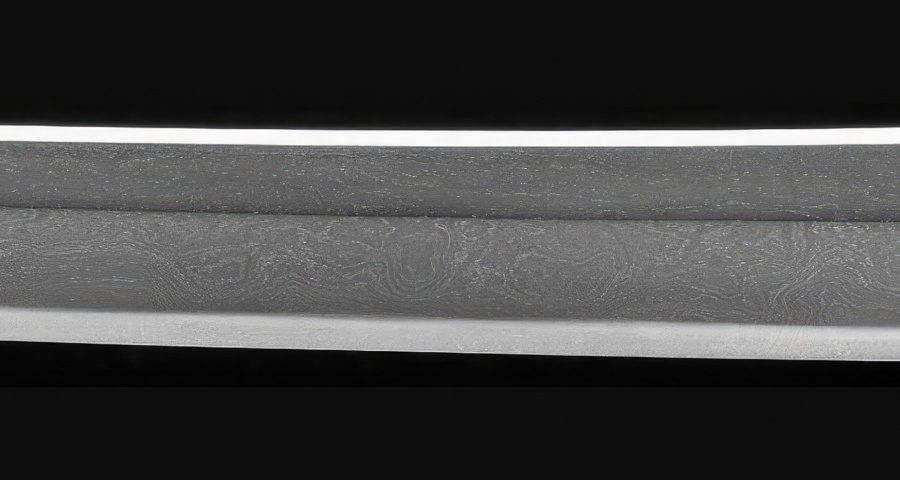
The Jihada is the visible grain pattern that can be spotted on most traditionally made Katanas. It comes from a blacksmithing technique called “tanren” and it is a result of folding the Tamahagane steel with a mallet. They are commonly called weld lines as well and can come in a variety of shapes like dotted, straight, irregular, patterns of wood lines, etc.
Nakago or Makago
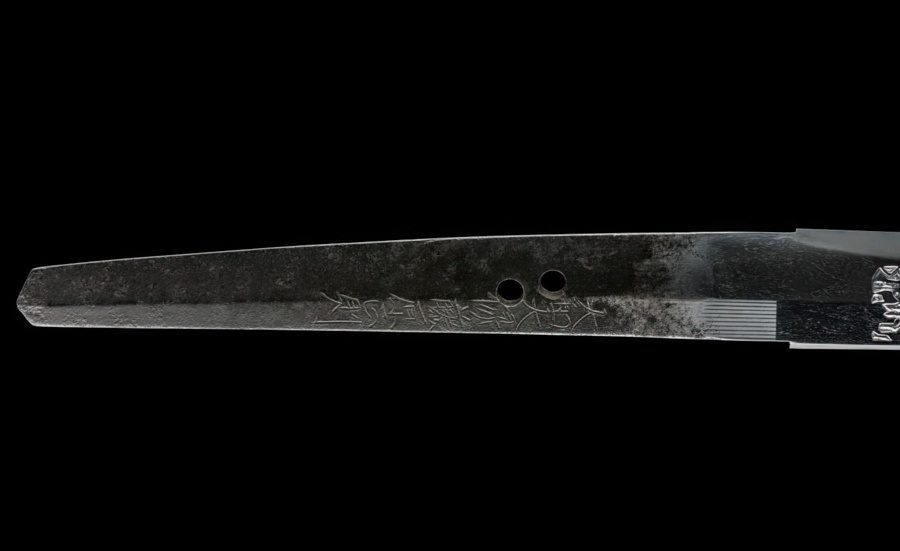
The Nakago is the dull appendage of the Katana blade placed on the other side of the sharp edge. It is the lowest part of the blade that goes inside the handle. To be able to see the Nakago, the handle needs to be taken apart and un-mounted.
Mei

A certified bladesmith who produces a sword would most probably carve their signature on the tang. Professional collectors or experts can look at the sword to tell a real Katana from a fake. Based on the mei, one can track the sword back to a particular time or bladesmith in history too.
Mune-Machi & Ha-Machi
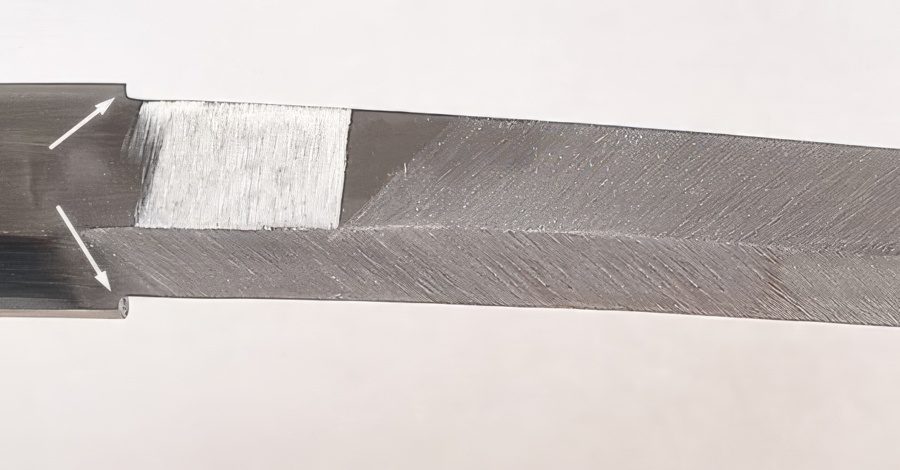
The Munemachi is just a 3-5mm notch on the spine of a Japanese sword that fits into the Habaki (blade collar). It is used to measure the blade in a straight line from the notch to the tip of the Kissaki. The “notch” or step between the cutting edge and the tang is called the Hamachi, which is on the other side of the Munemachi.
Guard – Tsuba
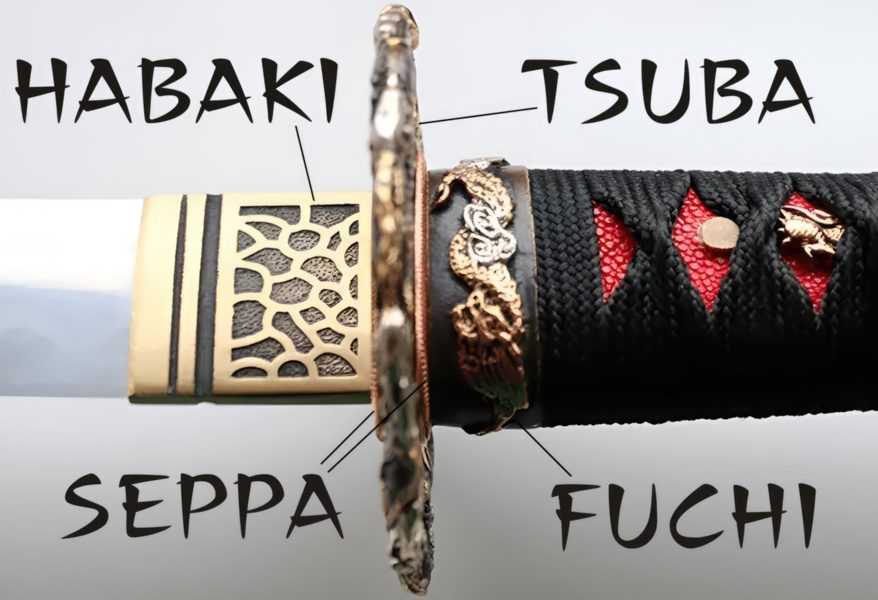
The guard fittings are where the blade and handle of the Katana come into contact. A Katana with a weak Tsuba and fittings is not very useful.
- Tsuba – Katana’s metal handguard
- Habaki – Blade collar on top of the Tsuba
- Fuchi – The metal sleeve under the Tsuba
- Seppa – Two metal separators on top and under the Tsuba
Tsuba
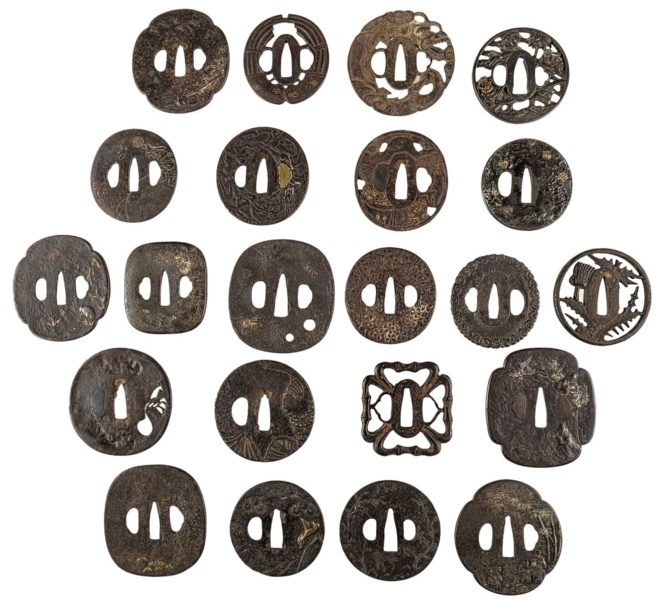
The handguard on a Samurai sword which is there for both protection and aesthetics is called a Tsuba. Each katana guard is different and beautifully made with traditional designs featuring flowers, dragons, important historical figures like Miyamoto Musashi and other natural symbols. While most Tsuba are circular, some can also be square or even rectangular.
When an opponent slides his blades down toward the wrists and fingers of a Katana wielder, the Tsuba, keeps the wielder’s hands safe. This protection is sometimes enhanced with the addition of several other elements. Here are some of the most important ones:
- Hira – The surface of the Tsuba is traditionally made of iron, but stainless steel can be used today to fight off rust.
- Mimi – This is the rim of the Tsuba, the most hardened part of the guard. The main purpose for this piece is to shield the Katana from incoming attacks.
- Nakago–Ana – The central opening which is in the shape of the blade that needs to go through it. This Katana guard piece needs to be made in the exact dimensions as the Katana blade so that the blade will fit perfectly.
- Sekigane – The fillers of the Nakago-Ana that are going to hold the blade’s spine and edge tightly in place.
- Hitsu–Ana – Some Katana guards can have more openings near the central Nakago-Ana. They are made for aesthetic purposes as well as to lighten the guard’s weight.
- Mei – The Tsuba takes a lot of experience, effort, and time to be created. That is why its creator can add their mei (name or signature) near the opening.
Habaki
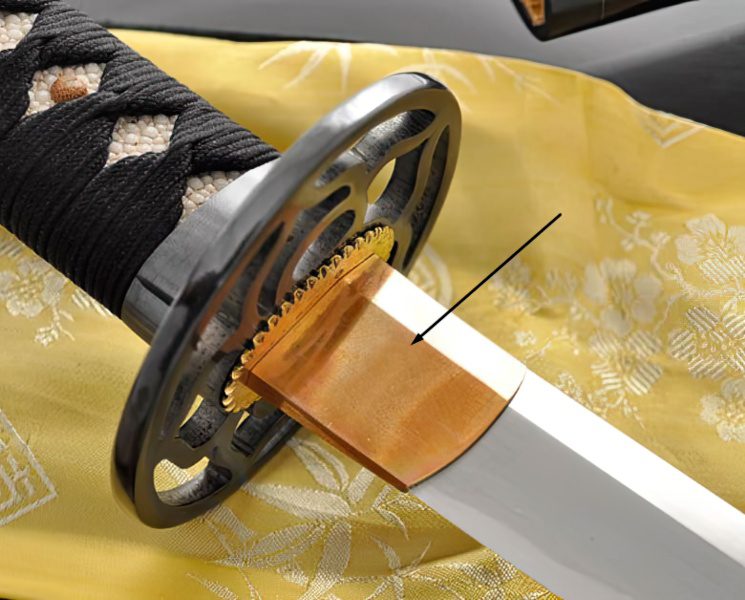
The Habaki is the name for the blade collar. After making the blade, the swordsmith would attach the Habaki to the bottom of the blade. Like a hand guard, the Habaki was made to keep the samurai warrior from hurting his own hands. If a warrior accidentally grabbed the bottom part of the Katana’s blade, he would touch the Habaki instead of the blade itself.
The Habaki is called the “heart” fitting of the Katana. It is the part that gets damaged the most if the blade is being used for cutting practice. That is why regular maintenance or a complete replacement is required.
Fuchi
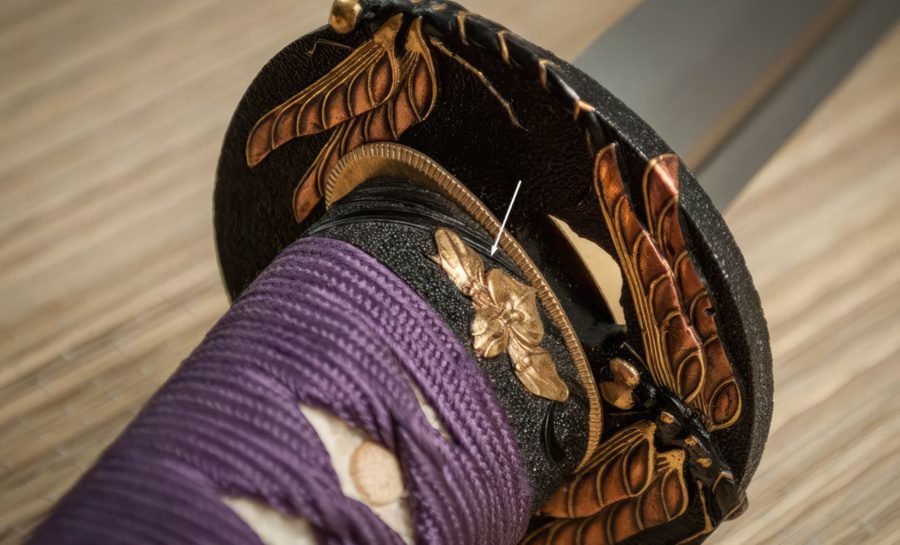
The Fuchi is the metal sleeve between the handle and the guard. It keeps the Tsuka and the other pieces together. Usually made out of iron, brass, or copper, it adds reinforcement to the entire handle as well as the Tsuba just above it.
Seppa
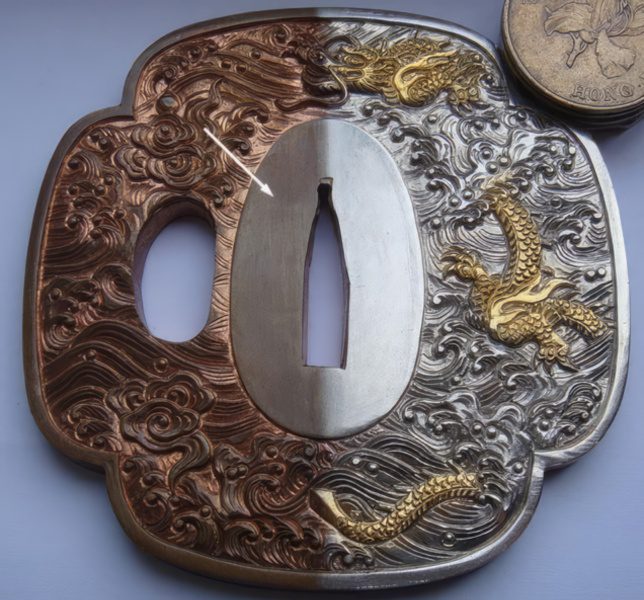
The Seppa is another brass piece placed behind the Habaki and above the Fuchi on the Katana blade. There are 2 Seppa fittings that keep the guard in place and prevent it from sliding off the blade. They also keep the Katana stable by adhering everything together.
Tsuka – Handle
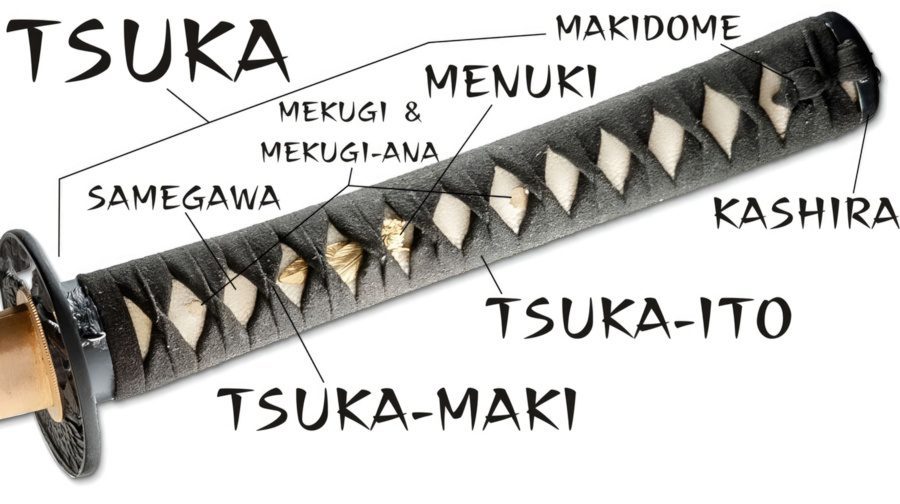
A sturdy Katana requires a firm handle, called a Tsuka. Given that it is often a work of art, the handle of the Samurai sword may contain personal and symbolic inscriptions. The Tsuka refers to the entire hilt of the Katana with all of its mountings and fittings. Some see it as the most important part of the sword as a high quality Katana is nothing without a proper handle.
- Tsuka – The wooden core of the Katana’s hilt
- Samegawa – Rayskin wrapped around the wooden core
- Tsuka Ito – The cord or wrap around it
- Tsuka Maki – The wrapping style of the Tsuka Ito that results in a pattern
- Menuki – Metal pieces under the Tsuka-Maki
- Mekugi & Mekugi-Ana – Wooden or bamboo pegs going through the holes of the tang
- Makidome – The final extending wrapping cord that holds everything together
- Kashira – The Katana’s pommel
Tsuka
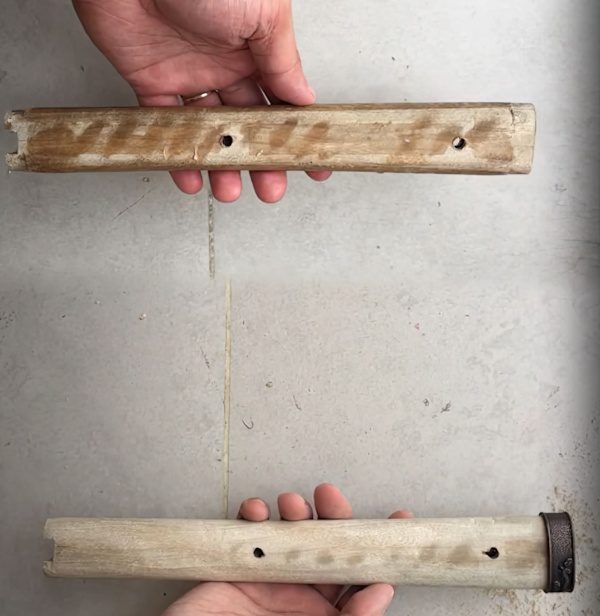
The Tsuka is the wooden grip that “slides” onto the tang of the sword to become the sword’s handle. This is the wooden core that is underneath the rest of the handle parts. While it is one of the most important parts of a katana, it usually cannot be seen unless the handle is taken apart.
Samegawa
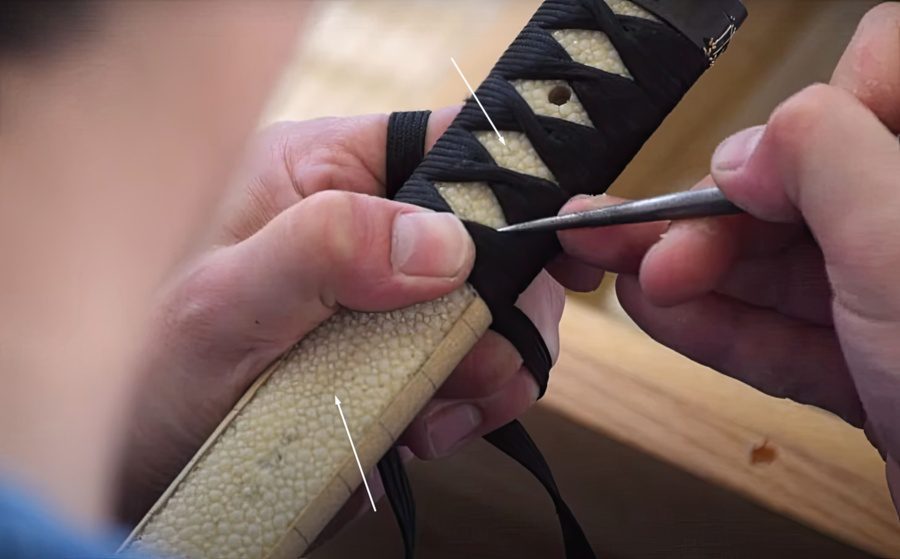
The Same or Samegawa is the layer wrapped under the Tsuka-Ito. The layer may be made of leather, ray skin, or shark belly. However, some cheaper Katana models use synthetic leather and even plastic. The Same is usually white or another contrasting color to the Menuki so it can be easily seen.
The Samegawa can only be seen through the openings of the Tsuka-Maki. Besides their aesthetic appeal, the Same has a rough surface which gives the sword a good grip. There are many different varieties depending on personal preferences which are called Samehada.
Tsuka Ito
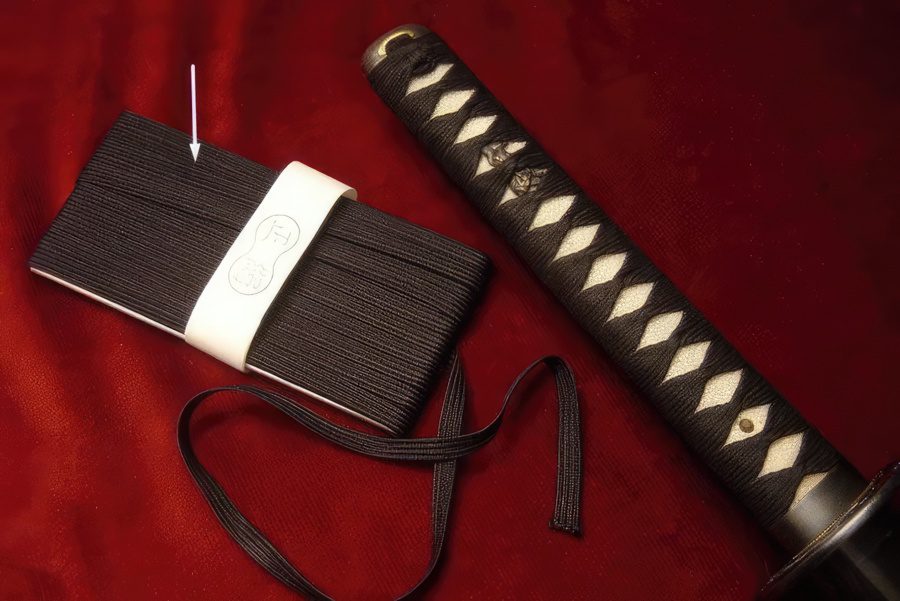
The Tsuka Ito is the patterned wrap that goes around the wooden handle. It can be made of silk, cotton, or leather. This string is wrapped tightly around the smooth piece of wood for a better grip. The wrapping process is another skill that takes time and practice to learn and master.
Tsuka-Maki
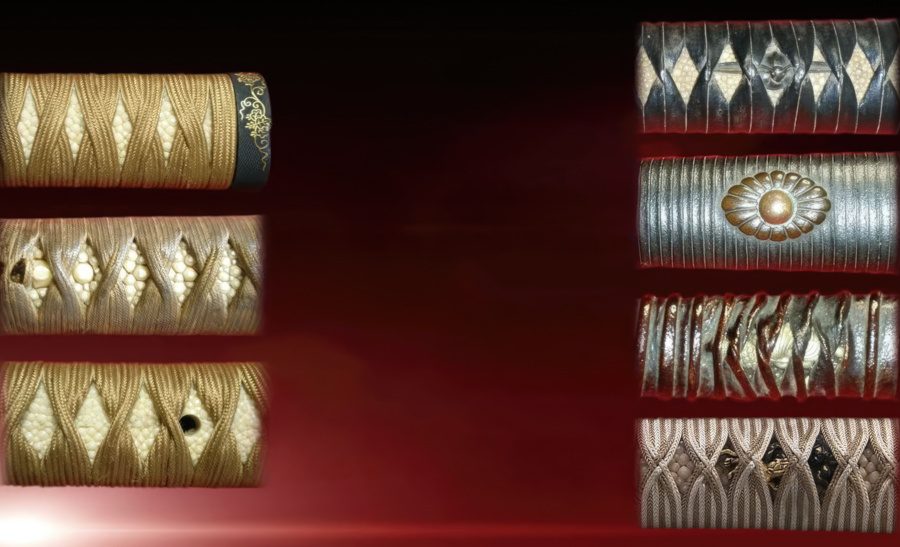
The process of wrapping the Tsuka Ito around the Tsuka is called Tsuka-Maki. There are multiple versions of the Tsuka-Maki and they are all made to improve the aesthetics of the Katana and grip.
Some of the most common versions of a Tsuka-Maki seen on a Katana are Katate-Maki, Shino-Maki, Tsunami-Maki, Ganki-Maki and Kata-Hineri-Maki. They each have an uneven pattern that allows the samurai to wield the sword without having to worry about the blade slipping out of their hands.
Menuki
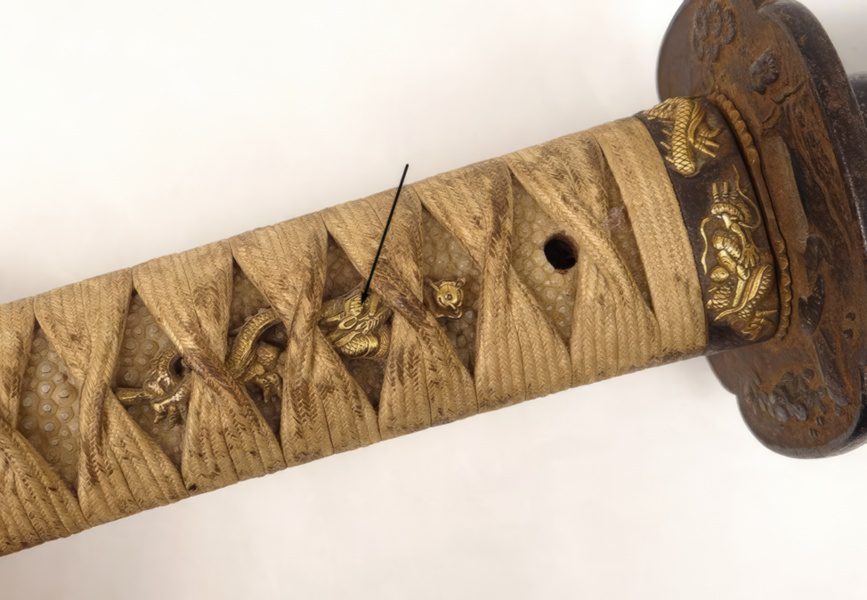
Menuki are small, ornate symbols and sculptures placed on top of the ray-skin. They often feature animals, flowers, nature, or personal symbols that are important to the owner of the sword.
Surprisingly, these decorative pieces had a practical use as well as it improves the grip of the katana. Originally, the purpose of the Menuki was to cover the tang holes on the sword known as Mekugi or Mekugi-Ana. However, there are also some Japanese swordsmiths who prefer the tang hole and the Menuki to be separate for aesthetic purposes.
Mekugi & Mekugi-Ana
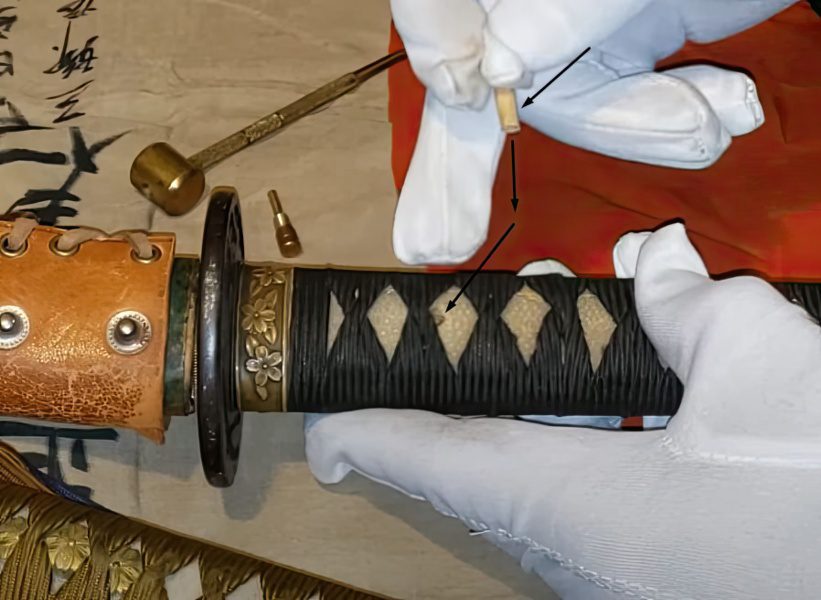
Mekugi are the two tiny bamboo pegs that firmly attach the wooden handle to the blade, playing a similar role to screws or nails. Both the tang and the handle have these little holes (Mekugi-Ana) that line up perfectly when you put them together, increasing the stability of the sword and handle. The Same and Tsuka-Ito increase the stability of the handle.
Makidome
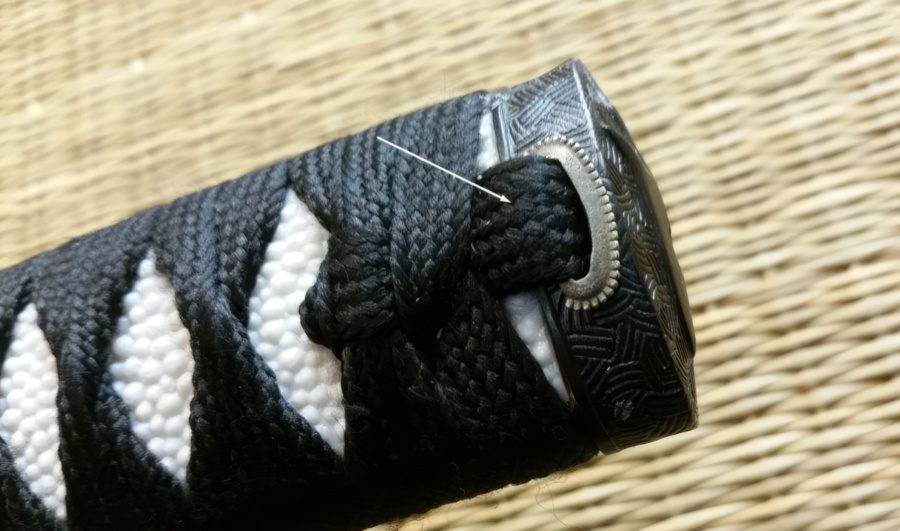
The last step in wrapping the Tsuka-Ito silk around the hilt is called Makidome. Most of the time, the Tsuka-Ito comes together in a knot on one side of the handle. The end knot is made when the wrapping goes through the Kashira (pommel) and the final part of the handle. The Makidome requires more attention as this knot is to hold the entire Tsuka-Maki together.
Kashira – Pommel
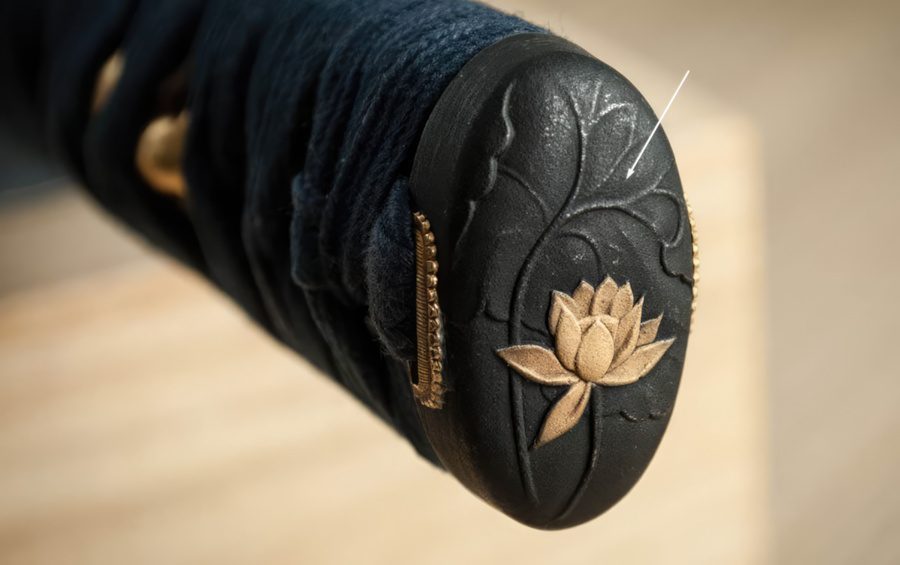
The Kashira (pommel) is the cap attached to the bottom end of the Katana. It is made with a strong material and can be used to hit opponents once they are in close range. It also adds to the Tsuka’s sturdiness and improves the Katana sword’s overall balance.
Apart from that, the Kashira is actually a big decorative piece. It holds the wrapping of the handle and has a tiny hole for the Makidome.
Saya – Scabbard
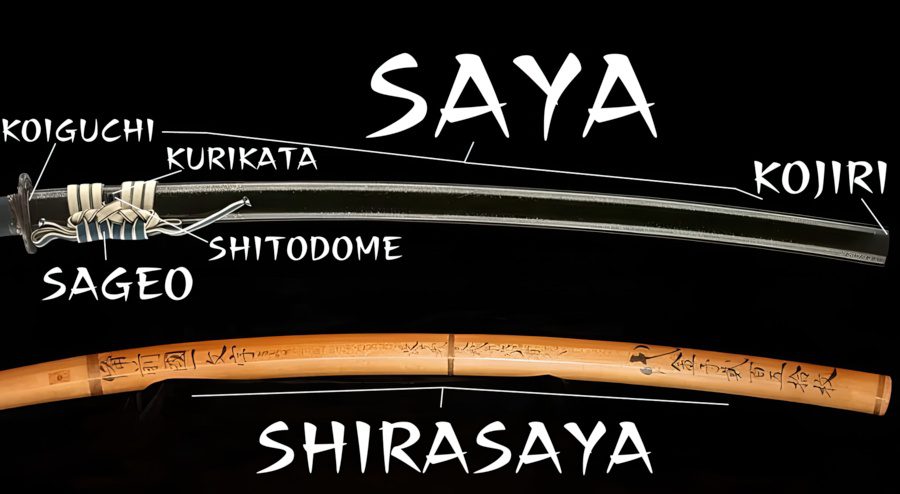
The Saya (sheath or scabbard) makes it easy to carry the Katana and keeps the blade from oxidizing or getting rusty. Japanese warriors always kept their Katanas in their sheaths when they didn’t use them to keep the steel from rusting and reduce the chance of an accident.
Japanese swordsmiths made the Saya to fit each Katana in terms of size, length, width, etc. Even by today’s standards, the creation of the scabbard is seen as a work of art. Besides its aesthetic appeal, one has to ensure that the sheathing and unsheathing process is smooth and quick.
- Saya – The scabbard or sheath for the Katana Sword
- Kurikata – A type of a cord on the scabbard
- Shitodome – An extension and opening on the scabbard for the Sageo
- Koiguchi – The opening of the scabbard for the Katana
- Koiguchi Ito – A type of rope or belt to carry the scabbard on the shoulder or back
- Kojiri – The metal cap at the end of the scabbard
Saya
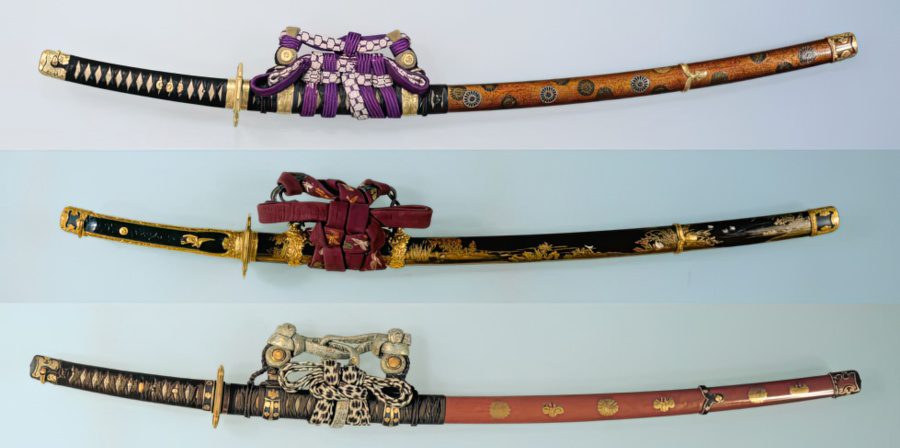
The Saya is the scabbard or sheath of the Katana. Usually constructed out of wood and heavily decorated with similar elements as the Katana’s handle, it functions to preserve the Katana blade, while also allowing the samurai to quickly sheathe or unsheathe their swords.
A Japanese scabbard that is made as a long-term storage solution for a katana is called a Shirasaya. It is traditionally made out of wood and rarely features any decorations.
Sageo
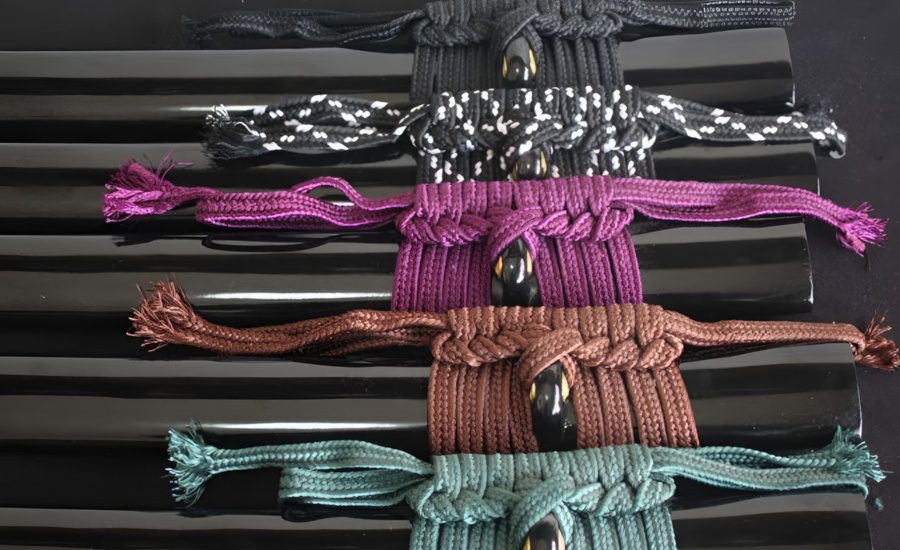
The thick cord holding the Saya to the wielder’s back, shoulder, or belt is called a Sageo. Wrapping through the Kurikata, the Sageo makes it easier to carry the sword. Traditionally the Sageo is made out of silk, leather, or cotton. It is tied around the Koiguchi linked to the Obi (traditional Japanese belt). There are many different styles when tying a Sageo depending on personal preference.
Kurikata
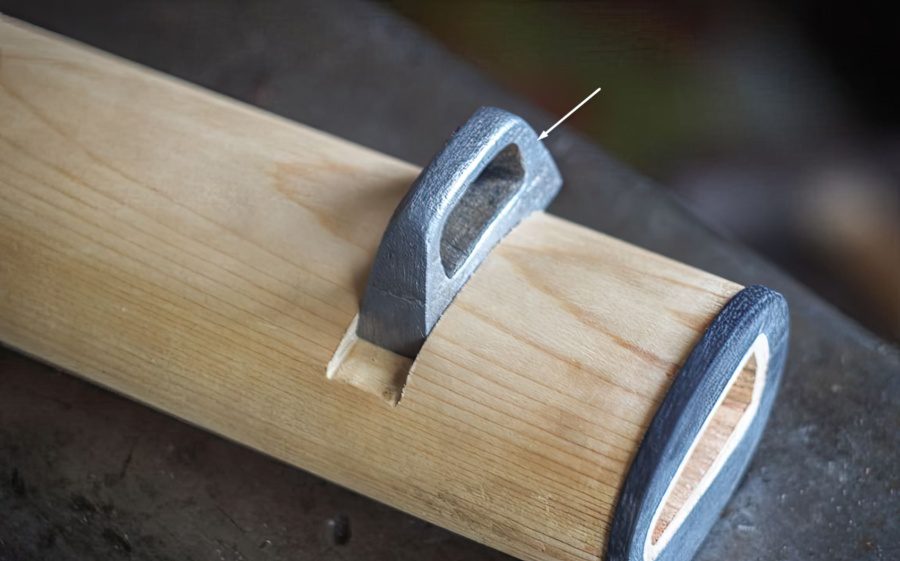
The Kurikata is the small extension or piece on the scabbard that allows the placement of a rope or cord through it. It was often used to secure the Saya to the waist or back. Although traditionally made from a water buffalo horn, metals such as iron, brass, copper, and even silver can be used today.
Shitodome
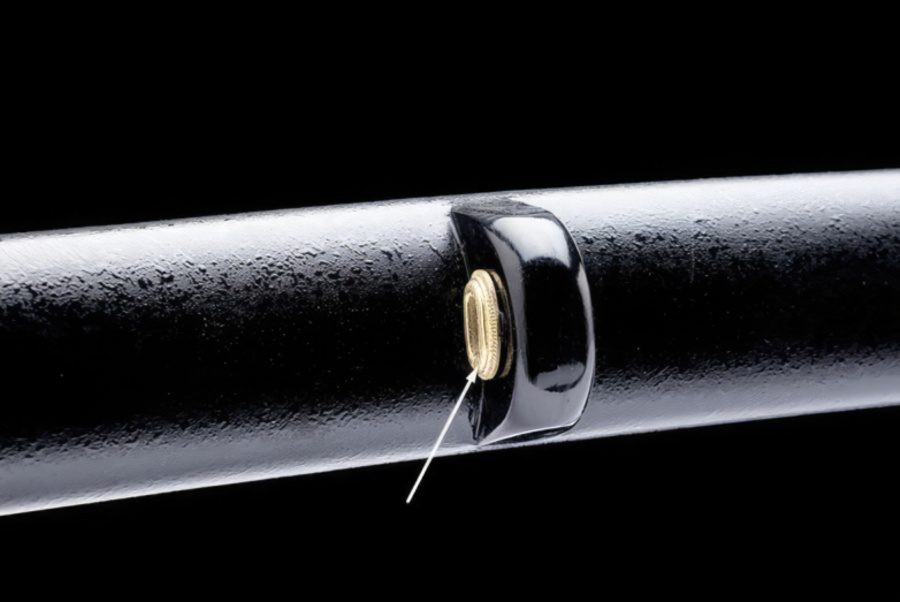
The decorative metal piece that functions to strengthen the Kurikata is called a Shitodome. Since this scabbard fitting usually enhances the aesthetics of the scabbard, it is occasionally made of gold. However, its more practical purpose is to tighten the Kurikata hole to ensure a tighter fit.
Koiguchi
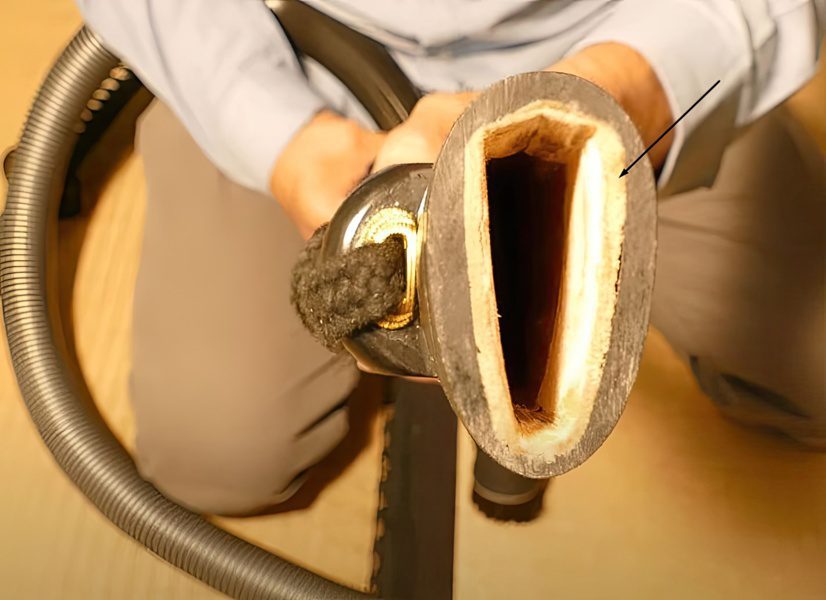
The Koiguchi is the opening of the Saya that allows the sword to slide into the sheath. During the crafting process, specific materials are used to produce a certain sound when it is unsheathed, especially swords used in ceremonies.
It was traditionally made out of wood or buffalo horn and polished on the inside so that the blade can be sheathed and unsheathed with ease. It is very important for the Koiguchi to fit with the Habaki so that the scabbard can “click” on and stay sheathed.
Koiguchi Ito
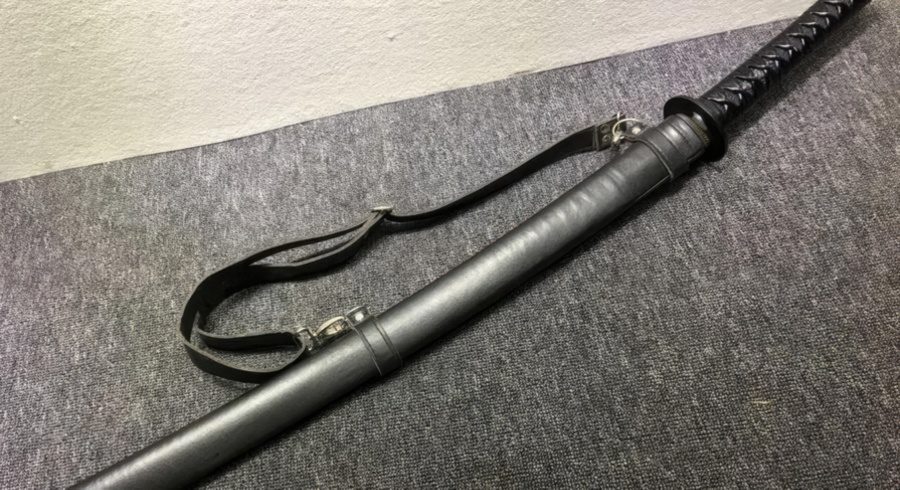
The Koiguchi Ito is the rope attached to the Katana so it can be carried on the shoulder or back. It goes through the Kurikata. Although not as common as the Sageo, it can be found on some Katanas when they are carried in a relaxed manner and not in the traditional style.
Kojiri
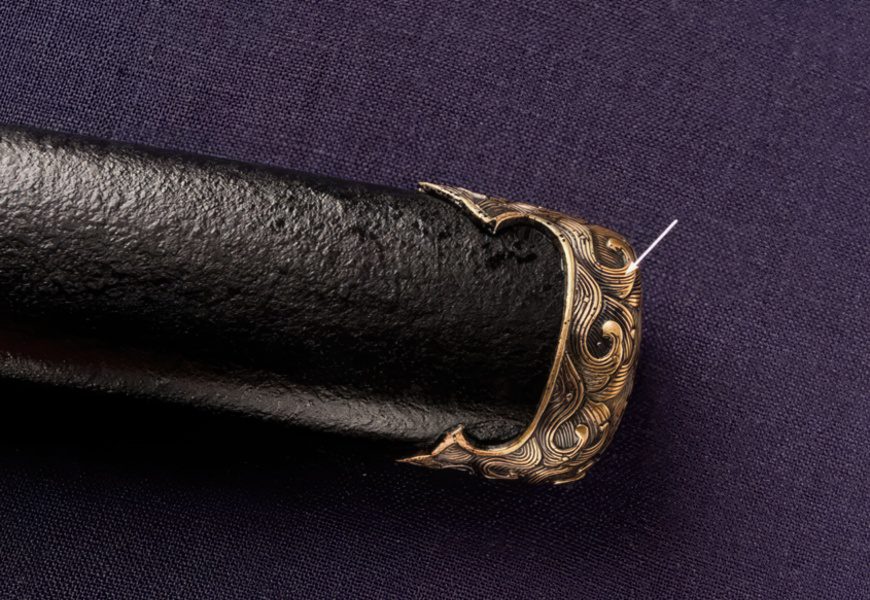
The Kojiri is the end point of the Saya. This is the very end of the Saya and usually houses the Kissaki. Traditionally made of water buffalo horn, this cap can also be made out of metal such as brass or copper.
