Shiage Togi: A Guide to Finish Polishing in Japanese Swords
NO AI USED This Article has been written and edited by our team with no help of the AI
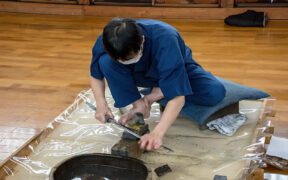
Shiage togi, or finish polishing, is the last half of Japanese sword polishing. It is performed by a professional sword polisher (togishi) using various polishing stones and techniques after shitaji togi (foundation polishing).
This stage is a complex process that brings out the fine details of the hamon(sword pattern) and steel. Each step in shiage togi contributes to refining the blade, enhancing its beauty and character while preserving its traditional craftsmanship.
A Brief Overview of Shiage Togi
Since shiage togi completes the sword polishing process, it is also known as finish polishing. The same principles in shitaji togi applies here:
- Great control and precision
- Awareness of blade and stone contact
- Paying special attention to the blade’s ridgeline.
However, there are some significant differences compared to the first half:
| Polishing Level | Polishing Stones | Movement |
|---|---|---|
| Shitaji Togi (Foundation) | Larger and coarser | Blade is moved over the polishing stone. |
| Shiage Togi (Finish) | Thin and shaved, backed with paper and lacquer | Blade remains stationary while stones are moved over the blade. |
The aim of shiage togi is to bring out the fine details of the hamon and the steel. This includes the effects of differential hardening such as the nie and nioi (large crystals and fine particles). All these details are crucial in giving the blade its identity and represents the togishi’s skill.
While a good polishing reveals and enhances all the details of the blade, a poor polishing will cloud them, decreasing the sword’s value and doing a disservice to the swordsmith.
Summary of Shiage Togi Steps
| Step | Function | Result |
|---|---|---|
| Hazuya | Remove marks from foundation polishing | Blade has a smooth and uniform whitish and cloudy appearance without any marks or blemishes |
| Jizuya | To bring out the shinogi ji and ji | Clearer and darker blade with distinct jihada |
| Nugui (Kanahada) | Slight polishing and to give the blade a darker and more uniform finish. | Darkened blade with a non reflective finish that highlights surface details and metal grain |
| Hadori | Cause deeper scratches on the hamon, lightening its appearance | Enhanced whitened hamon contrasting against darker nugui finish |
| Defining Yokote | To make the yokote line | Yokote is made at proper angle in relation the the edge and back of the blade |
| Kissaki Polishing | To polish the point area | Clear and whitened boshi has a matte finish, standing out from the rest of the blade |
| Migaki | Create contrast for the shinogi ji and mune | Bright and mirror-like shinogi ji and mune contrasts with the rest of the blade |
Steps in Shiage Togi
The following steps and processes are the major ones in shiage togi and are therefore, not exhaustive. In practice, a togishi may have additional or different steps depending on their school or individual style.
Hazuya
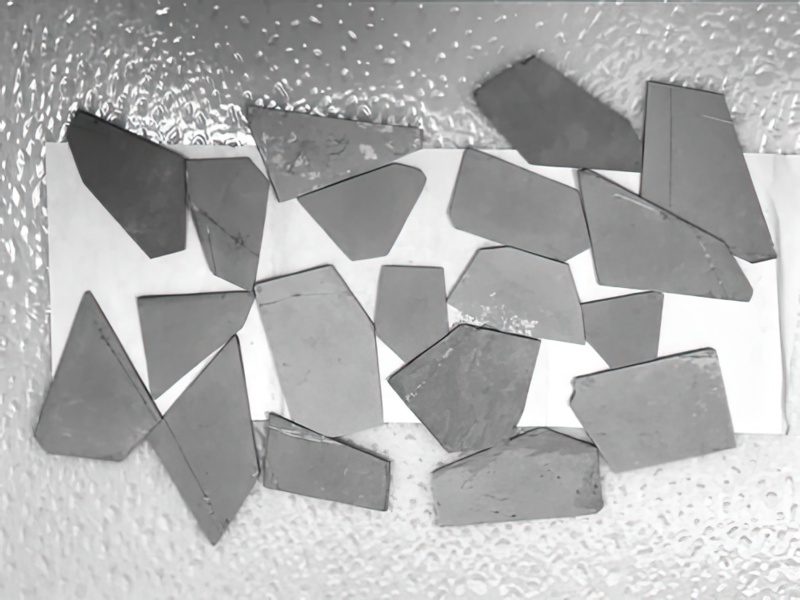
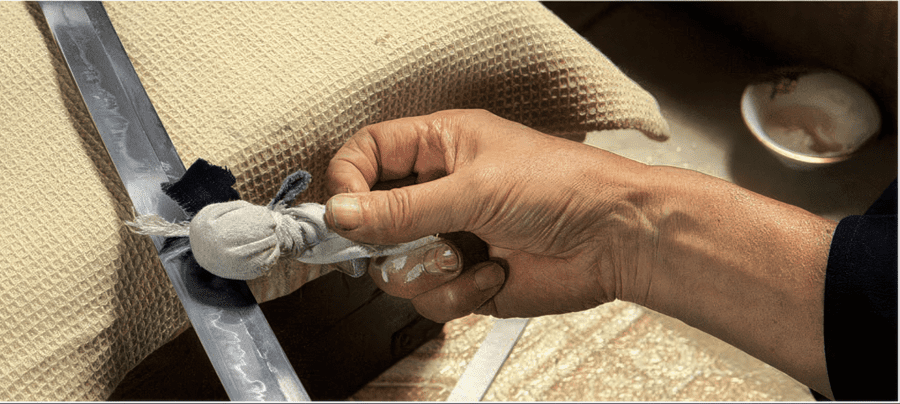
Hazuya stones are essential tools in the shiage togi stage of Japanese sword polishing. Made from thin slices of uchigumori stone, they are coated with lacquer, backed with Japanese paper, and cut into small squares.
These thin, flexible stones are made to suit the polisher’s technique, and while commercially available, many togishi prefer to make their own.
1. Preparation:
Once the hazuya stones are ready, other items required are:
- Tojiru – A thin lubricating paste made by rubbing two wet uchigumori stones together.
- Water – Sodium carbonate is added in the water so it is alkaline to prevent the blade’s wet surface from rusting.
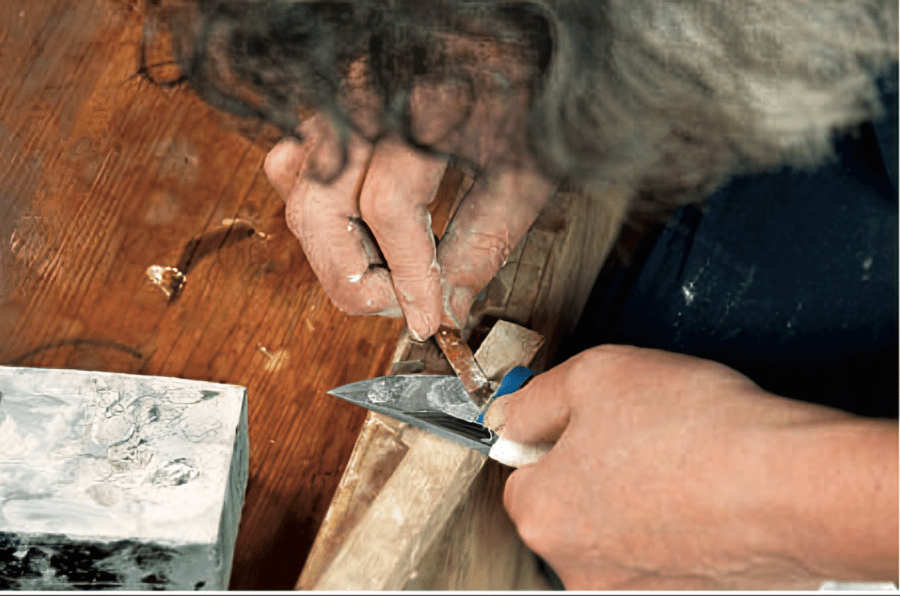
Polishing begins by applying a small amount of tojiru (a thin lubricating paste) and water onto an area of the blade that will be polished. The blade is then placed on a stand and held steady using the left hand.
2. Polishing Process
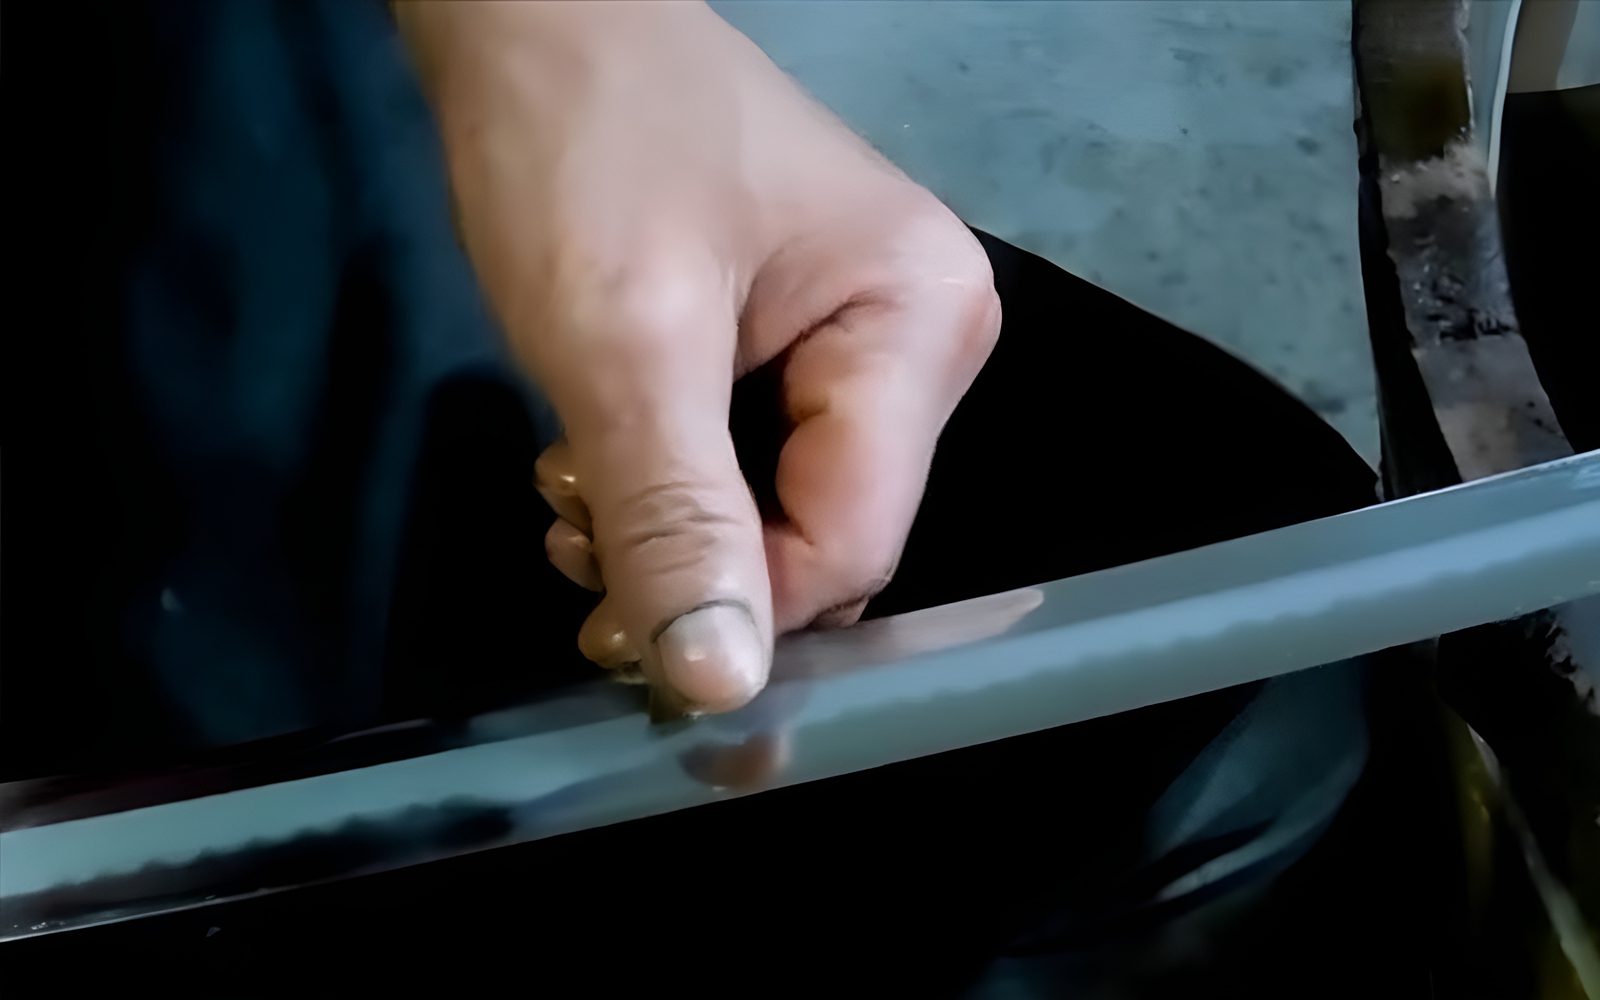
With the right index and middle finger curled into a fist, it is placed against the blade to serve as a guide during the process. The hazuya is held between the right thumb and blade. It is then moved back and forth lengthwise along the blade, one section at a time.
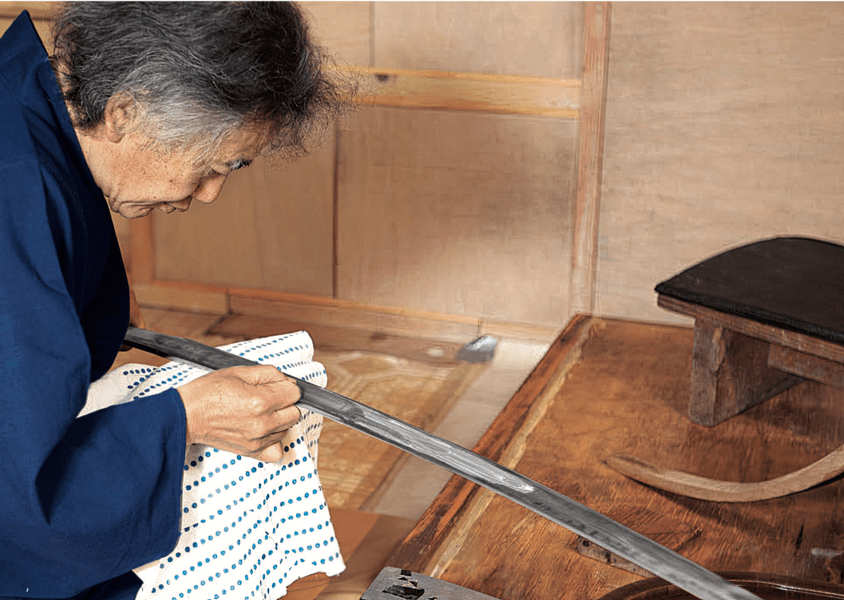
Hazuya polishing starts at the tang’s ridgeline down to the edge, gradually moving towards the point. Note that the Kissaki (point) is not polished at this stage.
If foundation polishing steps were done well, hazuya polishing will significantly take less time.
- Function: Remove uchigumori marks
- Results:
- No marks or blemishes in the hamon or steel
- Smooth and uniform blade surface
- Blade has a whitish and cloudy appearance
Jizuya
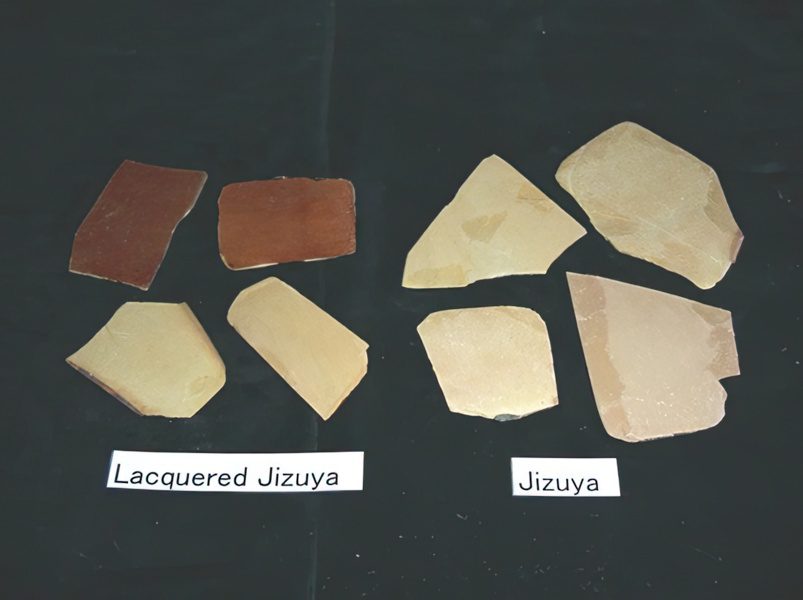
The orange or yellowish brown Jizuya stones are made by chiseling flakes from a narutaki stone. It is similar to uchigumori, but harder and finer. Like the Hazuya stones, grind the flakes and back them with paper and lacquer.
There is much variation in the hardness of the stones at this stage. Based on preference, vision, and experience, the togishi chooses the grade of jizuya to use. This will affect the blade’s final texture, color, and steel detail.
Jizuya stones are used in the same way when polishing as Hazuya stones.
- Function – To bring out the sinogi ji and ji
- Result
- Blade becomes clearer and darker
- Jihada begins to stand out
Nugui
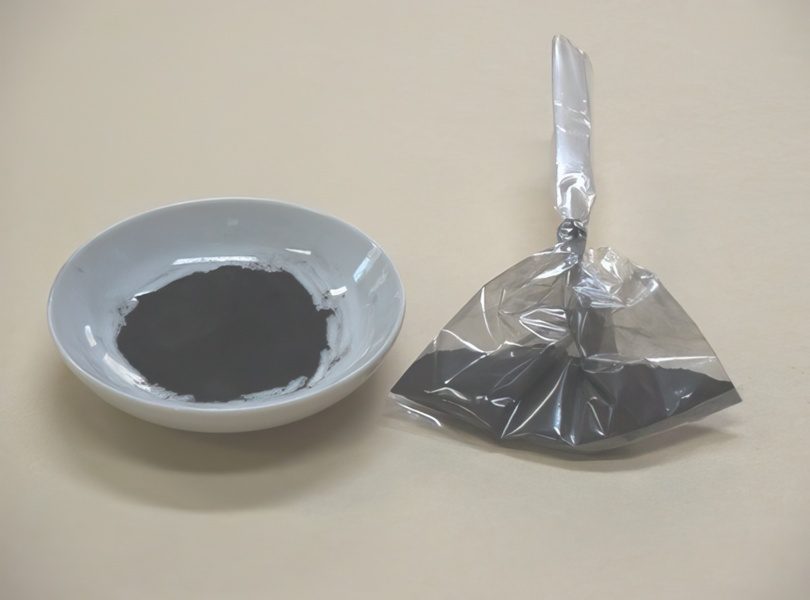
Nugui is a fine mixture of iron oxide particles and vegetable oil, used as a gentle abrasive in Japanese sword polishing. While it can be bought, some togishi prefer to make it themselves.
This final step in surface polishing entails applying a small amount of nugui to the blade and rubbing it in with cotton. This is done section by section, one to three times over the entire blade.
Note that it is not used on the point area.
- Function
- Slight polishing
- Cosmetic purposes – Darkening and highlighting parts of the blade
- Result
- Darkened steel – Too much nugui turns the metal black
- Non reflective finish
- Highlights surface details and grain pattern
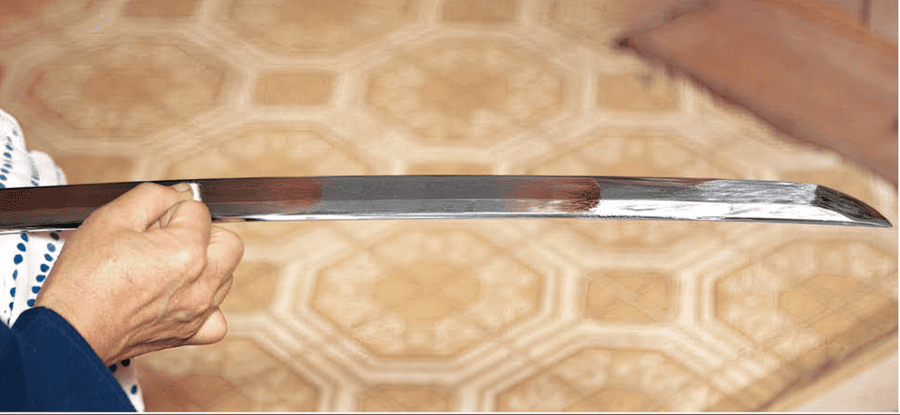
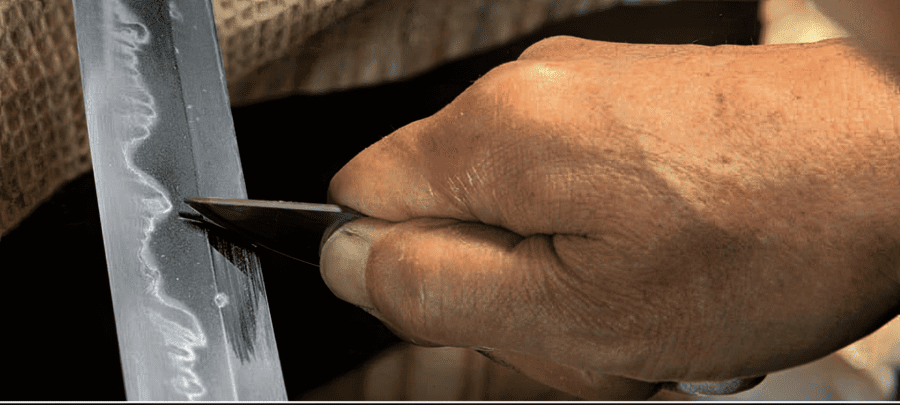
Hadori
Since a prominent white hamon is often favored today even by NBTHK judges, hadori is often performed to produce a contrasting edge.
This is performed using a hazuya stone cut into an oval shape to remove any sharp corners that can scratch the blade.
Since the hazuya stone is coarser than the jizuya stone and nugui mixture, it results in larger scratches.
This means hadori polishing results in an area that appears whiter than the rest of the blade. This is a time consuming step and can take up to two days to complete.
Note that while a white hamon is preferred, it can mask some of the finer details of the blade.
Therefore, collectors who focus on metalwork and craftsmanship prefer to omit hadori and use sashikomi polishing instead to emphasize the details of the hamon.
- Function
- Causes deeper scratches than jizuya and nugui
- Lighten the appearance of the hamon
- Result: Hamon is whitened, causing its appearance to be enhanced as it contrasts against the darker nugui finish applied previously.
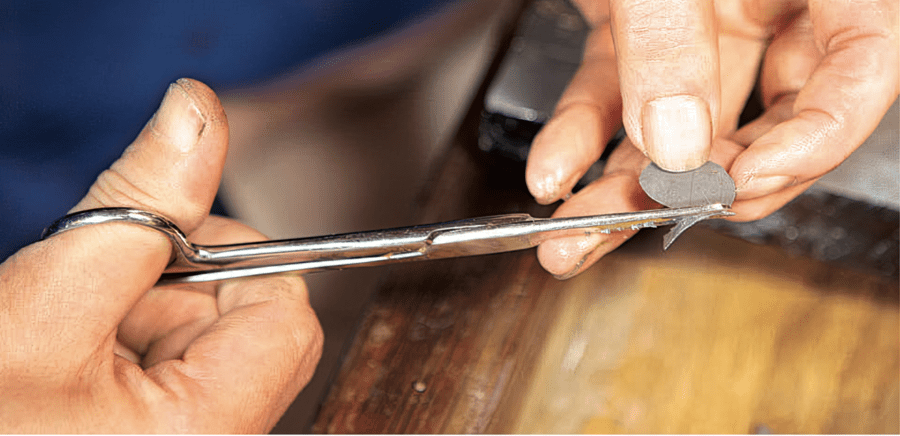
Kissaki no Narume (Point Polishing)
During foundation polishing, the point area is moved perpendicularly over the stones. In the final stage, polishing the point is left till much later, skipping hazuya, jizuya, and nugui.
1. Defining Yokote
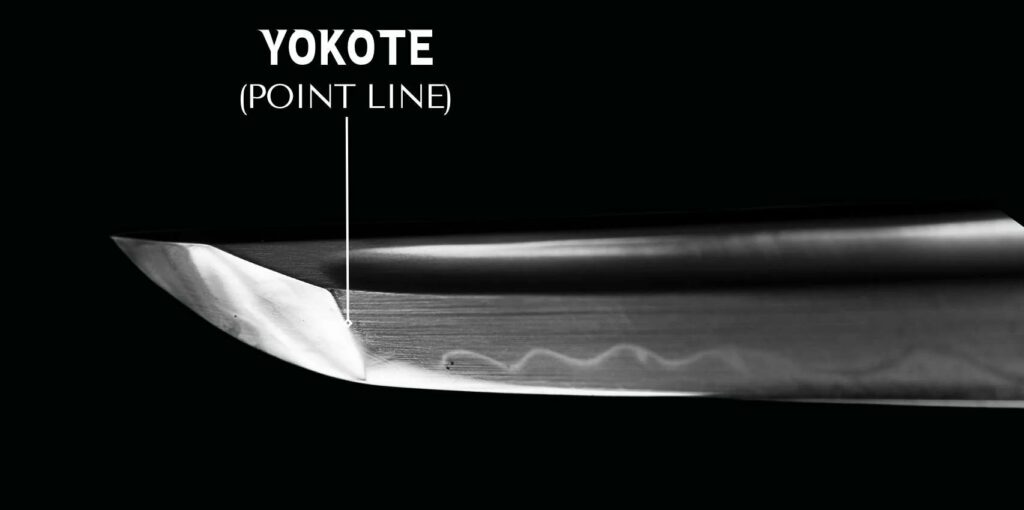
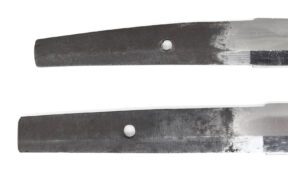
The point area is divided from the rest of the blade by the yokote, a straight line running across the blade to the edge. There can be an actual ridge or just a visual demarcation.
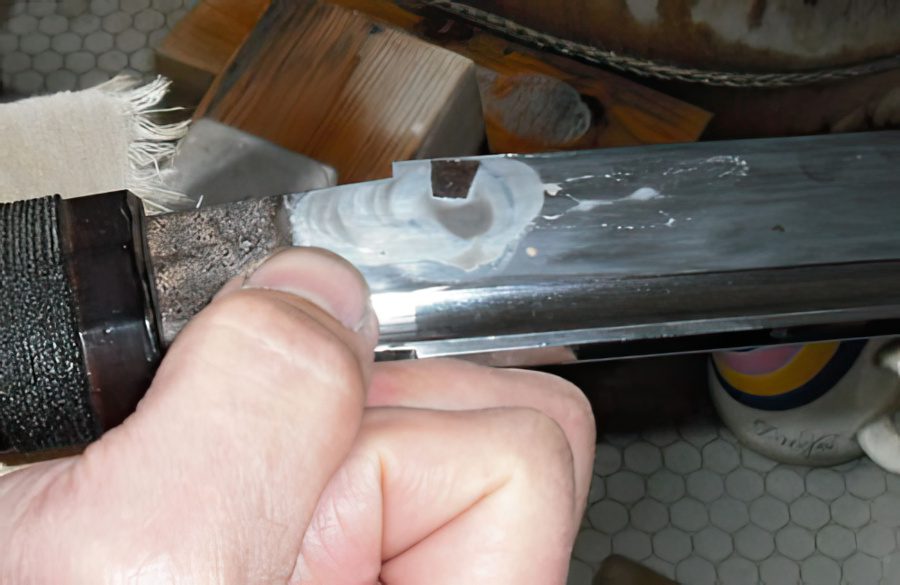
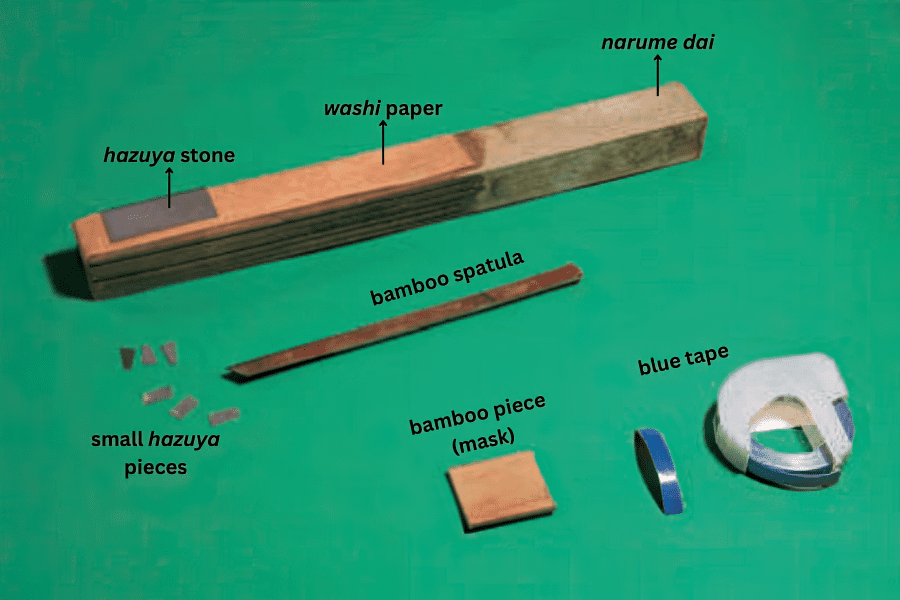
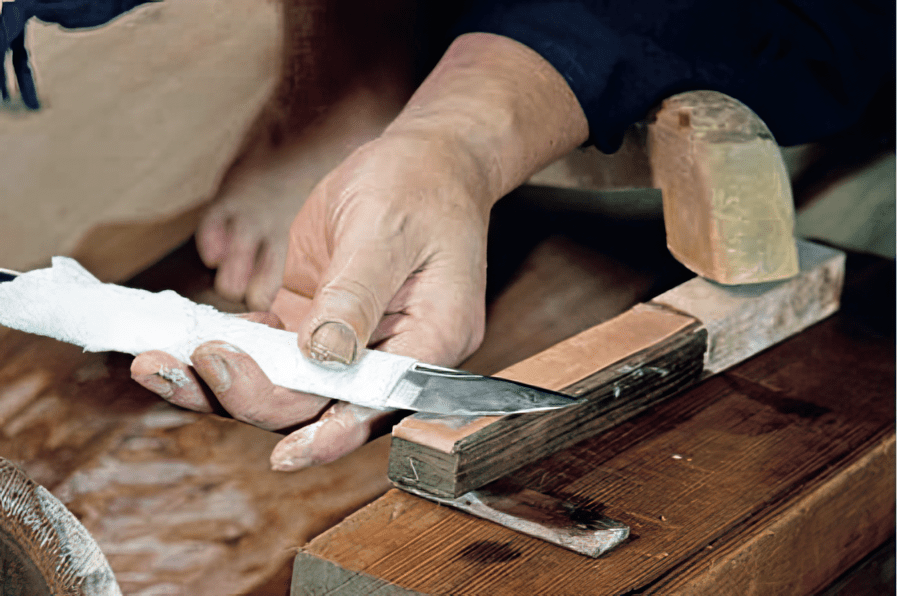
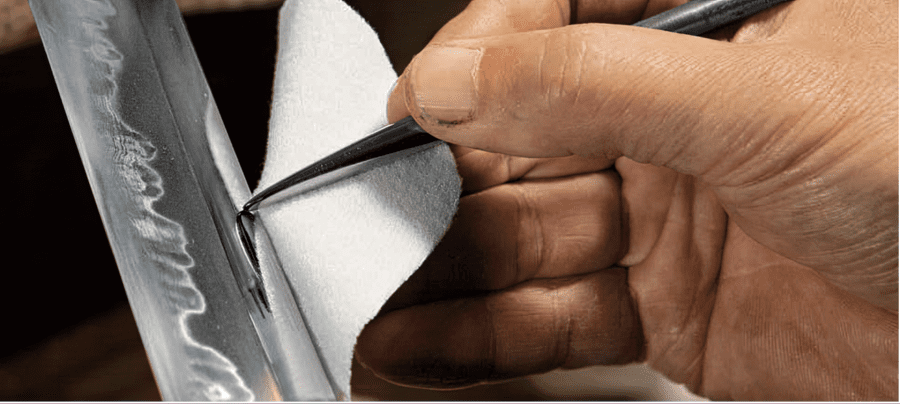
Before polishing the point, the rest of the blade is wrapped for protection. A flat bamboo guide (mask) is placed on the blade to define the yokote (line separating the tip).
With the mask secured, polishing paste (tojiru) is applied, and a small piece of hazuya (polishing stone) is placed flush against the mask’s edge. Using a bamboo spatula, the polisher moves the hazuya back and forth along the mask’s edge.
This process makes the point area whiter and more distinct, resulting in a clear and sharp yokote.
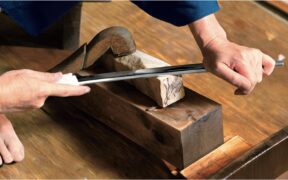
2. Polishing Process
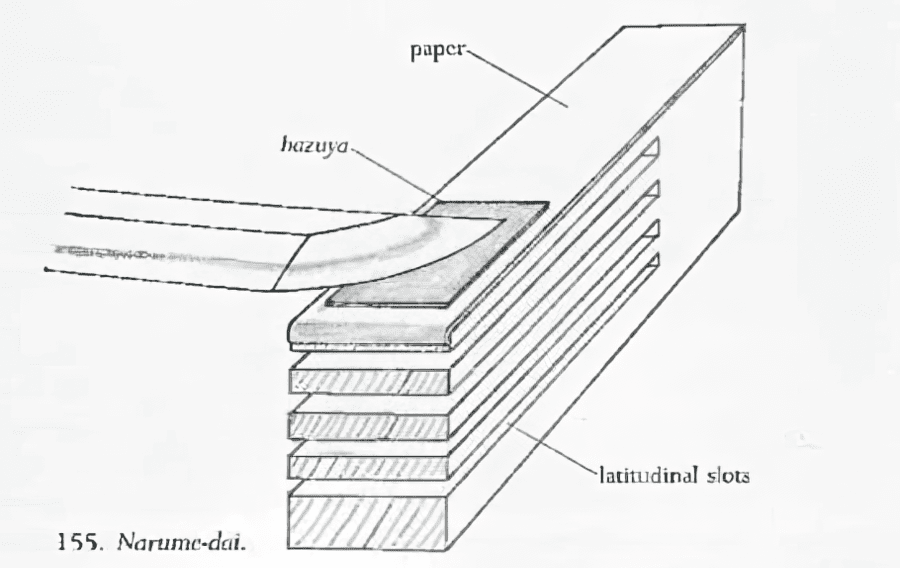
A narume dai is a wooden block used to support the polishing process. Layers of soft Japanese paper, soaked in water, are placed on the block, with a thin piece of hazuya stone on top.
The wet paper helps the stone move smoothly, while the narume dai cushions it, allowing the polisher to apply even pressure.
This setup is crucial for polishing the rounded point area, ensuring the stone makes full contact with the surface.
To polish, the point area is carefully moved back and forth over the hazuya, working from the yokote (line separating the tip) to the blade’s tip, ensuring a smooth and even finish.
- Function
- Polishing the tip of the blade
- Result
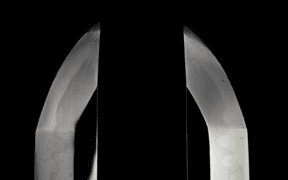
- Boshi (tip area’s temper line) is whitened, clear, and has a matte finish, allowing it to stand out from the rest of the blade.
- Yokote is at the proper angle in relation to the back and edge of the blade.
Migaki: Burnishing
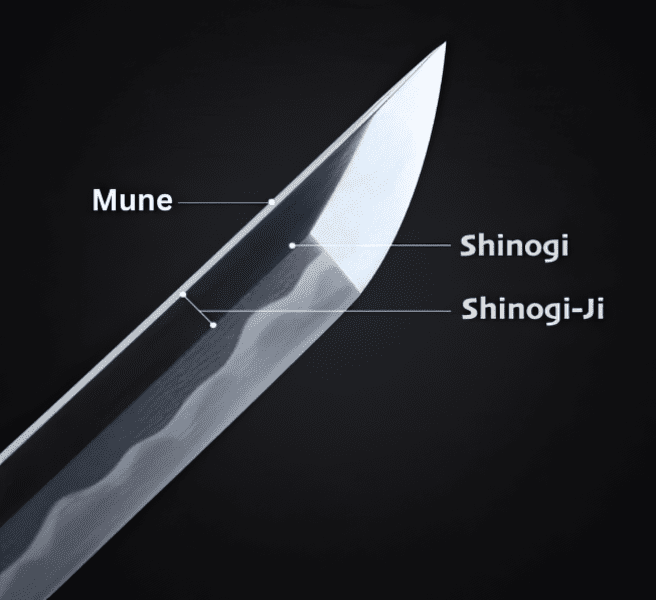
Shiage togi is finished with migaki, or burnishing, which polishes the mune (back of the blade) and the shinogi-ji (the flat surface between the back and the ridgeline).
Burnishing uses pressure to compact the steel, creating a smooth, shiny, and reflective surface that highlights the blade’s craftsmanship.
1. Burnishing Preparations & Tools
Before burnishing, the relevant surfaces are prepared by cleaning them with tsunoko paste, a mixture of powdered horn and water.
Once it dries, a fine powder called ibota is dusted over the blade.
This powder, made from a waxy substance produced by insects, acts as a lubricant, helping the burnishing tools glide smoothly.
For the process, migaki bera (burnishing spatulas) and migaki bo (burnishing needles) will also be required.
2. Burnishing the Surfaces
The burnishing spatula is used before finishing using the needle. Both are rubbed briskly over the surfaces until there is an even mirror-like finish.
Burnishing starts near the tang up to the blade, around 1.5 inches (3 – 4 cm) at a time.
- Function
- To create a decorative contrast between the mune and shinogi ji with the rest of the blade.
- To polish the inner surface of grooves.
- Result
- The blade’s shinogi ji and mune have a bright and mirror-like reflective surface, contrasting with the other areas of the blade.
The Final Result
After both foundation and finishing polishing, the togishi’s job is complete. The polished blade will feature clean and well defined lines with a clear and even finish. The various details on the blade are brought out including the:
- Distinct grain
- Surface textures
- Prominent hamon
- Delineated yokote
- Finished point
- Contrasting surfaces